5 Cold-Hardy Edible Perennials for Food Gardens

5 Cold-Hardy Edible Perennials for Food Gardens

Growing a resilient, productive food garden that thrives year after year without constant replanting is every gardener’s dream. That’s where cold-hardy edible perennials come into play. Unlike annuals that require sowing each season, perennials return reliably year after year, making them a sustainable and time-saving option for home gardeners. For those living in cooler climates, cold-hardy edible perennials are particularly valuable, as they withstand frost and freezing temperatures while still offering delicious, nutritious harvests.

In this guide, we’ll explore five cold-hardy edible perennials that deserve a place in your food garden. We’ll cover their growing conditions, care tips, and the benefits they bring to both your garden and kitchen.


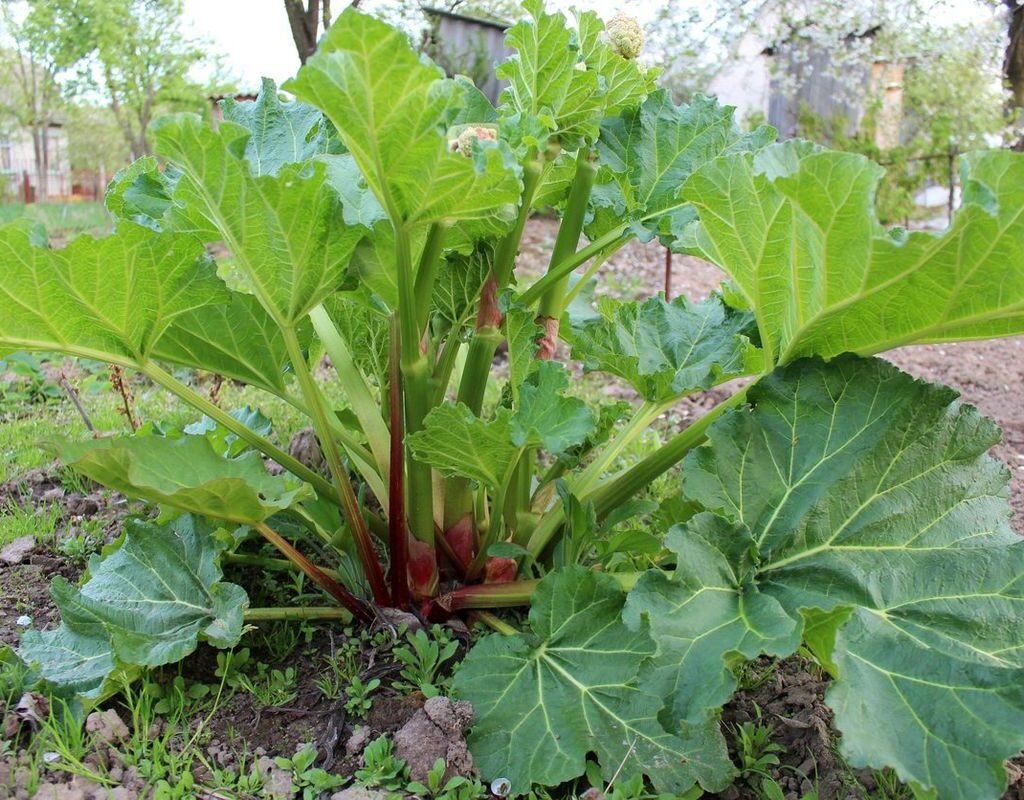
1. Rhubarb (Rheum rhabarbarum)

Rhubarb is a classic cold-hardy perennial that thrives in cool climates and rewards gardeners with tart, flavorful stalks year after year.

Growing Conditions:

  • USDA Zones: 3–8
  • Soil Needs: Rich, well-drained soil with plenty of organic matter
  • Sunlight: Full sun to partial shade

Care Tips:

  • Plant rhubarb crowns in early spring or fall, giving them plenty of space (at least 3 feet apart).
  • Avoid harvesting during the first year to allow the plant to establish strong roots.
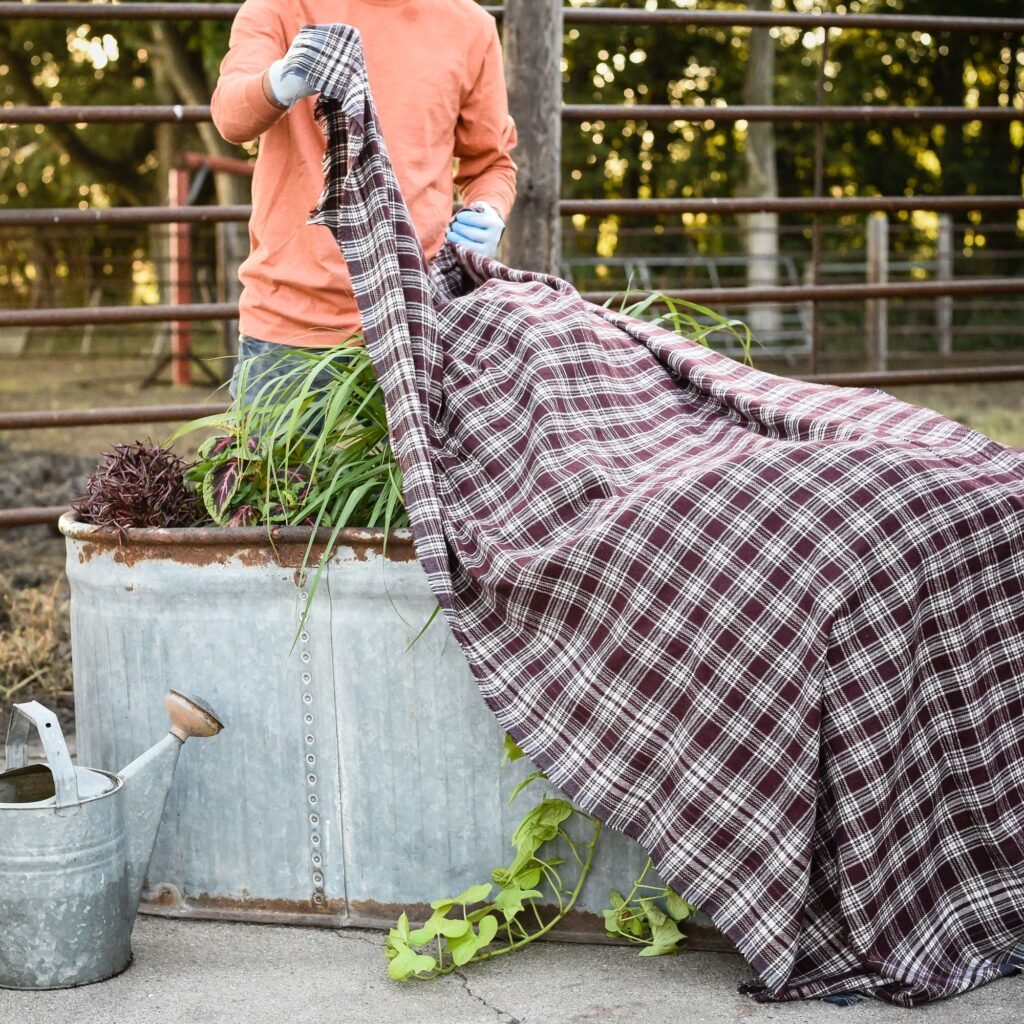
  • In winter, cover the crown with mulch to protect it from extreme frost.

Harvest and Use:

  • Stalks are harvested in spring and early summer, offering a tangy addition to pies, jams, sauces, and desserts.
  • Only the stalks are edible—never eat rhubarb leaves, as they contain toxic oxalic acid.

Rhubarb’s resilience and distinct flavor make it one of the best edible perennials for cold-weather gardens.


2. Asparagus (Asparagus officinalis)

Asparagus is one of the most rewarding cold-hardy perennials, prized for its tender shoots that emerge in early spring—the very first harvest of the season.

Growing Conditions:

  • USDA Zones: 3–8
  • Soil Needs: Sandy, well-drained soil enriched with compost
  • Sunlight: Full sun

Care Tips:

  • Start with asparagus crowns planted in trenches 6–8 inches deep.
  • Be patient—asparagus takes 2–3 years before reaching full harvest potential.
  • Mulch annually and fertilize with compost to encourage vigorous growth.
  • Plants can remain productive for up to 20 years with proper care.

Harvest and Use:

  • Spears are harvested in early spring when they reach 6–8 inches tall.
  • Enjoy them fresh, roasted, grilled, or in soups and salads.

Asparagus not only provides a delicious early-season crop but also adds ornamental feathery foliage that beautifies your garden.


3. Jerusalem Artichoke (Helianthus tuberosus)

Also known as sunchokes, Jerusalem artichokes are hardy perennials producing knobby, potato-like tubers that remain crisp and nutty in flavor.

Growing Conditions:

  • USDA Zones: 3–9
  • Soil Needs: Loamy, well-drained soil
  • Sunlight: Full sun

Care Tips:

  • Plant tubers 3–5 inches deep and 12–18 inches apart.
  • They can spread aggressively, so consider growing them in contained areas or raised beds.
  • After frost, cut back dead stalks and mulch lightly to protect the soil.

Harvest and Use:

  • Tubers can be harvested after the first frost, when their sweetness intensifies.
  • They can be roasted, sautéed, or eaten raw in salads for a crisp crunch.

Jerusalem artichokes are highly cold-tolerant and store well in the ground, offering a reliable winter food source.


4. Sea Kale (Crambe maritima)

A lesser-known perennial, sea kale is a nutritious, cold-hardy plant with edible shoots, leaves, and roots. It has long been cultivated in Europe as a vegetable and is gaining popularity in home gardens for its versatility.

Growing Conditions:

  • USDA Zones: 4–8
  • Soil Needs: Sandy, well-drained soil with good drainage
  • Sunlight: Full sun to partial shade

Care Tips:

  • Sea kale can be propagated from root cuttings or seeds.
  • It requires minimal maintenance once established but benefits from mulching in winter.
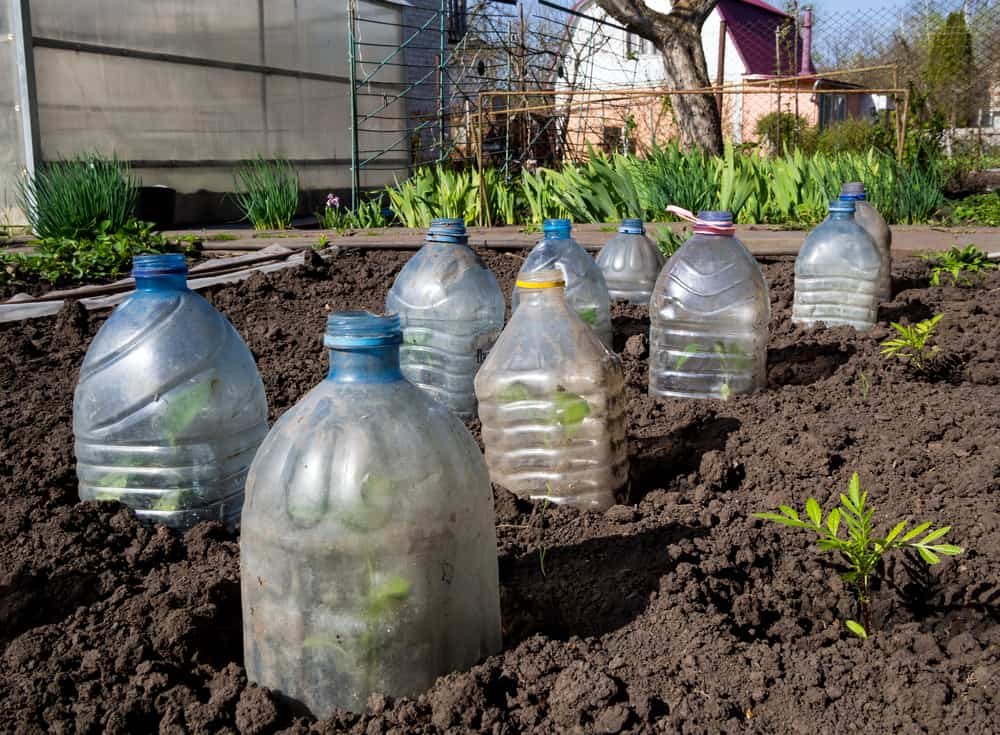
  • To achieve tender blanched shoots in spring, cover the plant with a pot or cloche.

Harvest and Use:

  • Young shoots in spring are eaten like asparagus.
  • Leaves can be harvested for cooking like spinach.
  • Roots are edible when boiled or roasted.

Sea kale is highly ornamental, with broad, bluish leaves and fragrant white flowers that also attract pollinators.


5. Sorrel (Rumex acetosa)

Sorrel is a leafy green perennial known for its lemony, tangy flavor that adds zest to soups, salads, and sauces.

Growing Conditions:

  • USDA Zones: 3–9
  • Soil Needs: Fertile, moist, well-drained soil
  • Sunlight: Full sun to partial shade

Care Tips:

  • Plant sorrel from seed or transplants in spring.
  • Cut back flower stalks to encourage leaf production.
  • Mulch heavily in winter to protect roots from freezing.

Harvest and Use:

  • Leaves can be harvested as soon as they are large enough to pick.
  • Use fresh in salads or soups, or cook them down for sauces.
  • French sorrel is especially prized for its culinary uses.

Sorrel is one of the first greens to appear in spring, offering a much-needed vitamin boost after winter.


Benefits of Cold-Hardy Edible Perennials

  1. Low Maintenance – Once established, they require less effort compared to annual vegetables.
  2. Reliable Yields – They return year after year, ensuring food security.
  3. Soil Health – Deep-rooted perennials improve soil structure and reduce erosion.
  4. Season Extension – Many perennials, such as asparagus and sorrel, are among the first crops ready to harvest each spring.
  5. Eco-Friendly Gardening – Fewer plantings reduce the need for constant soil disturbance and inputs, making them more sustainable.

Final Thoughts

Cold-hardy edible perennials are an invaluable addition to food gardens, especially for those living in cooler climates. By incorporating plants like rhubarb, asparagus, Jerusalem artichoke, sea kale, and sorrel, you create a garden that is not only productive but also resilient, sustainable, and beautiful.

Whether you’re a beginner gardener or an experienced grower, these hardy crops will reward you year after year with minimal effort. Plus, their diversity ensures that you’ll always have something fresh and delicious to enjoy from your garden—even after a harsh winter.

So, if you’re looking to establish a self-sustaining food garden, start with these five cold-hardy edible perennials and enjoy the long-term benefits of homegrown, perennial produce.

How to Protect Plants from Frost During Winter

How to Protect Plants from Frost During Winter

Winter can be one of the most challenging seasons for gardeners and plant enthusiasts. As temperatures drop, frost becomes a significant concern, especially for tender plants, flowers, and vegetables. Frost can damage leaves, weaken roots, and even kill entire plants if left unchecked. However, with the right strategies, you can safeguard your garden and ensure your plants remain healthy throughout the cold season.

This guide will provide practical, easy-to-follow methods on how to protect plants from frost during winter, while also explaining why frost occurs, which plants are most vulnerable, and how to prepare your garden in advance.


Understanding Frost and Its Impact on Plants

Frost occurs when the temperature near the ground drops to 0°C (32°F) or lower, causing water vapor in the air to freeze and form ice crystals. These crystals can settle on leaves, stems, and buds, drawing moisture out of the plant tissues and causing cell damage.

Types of Frost:

  1. Hoarfrost – A light, white frost forming on plant surfaces.
  2. Black Frost – A more damaging frost where ice forms inside plant tissues, turning leaves dark or black.
  3. Radiation Frost – Occurs on clear nights when heat escapes quickly from the soil.

Plants Most at Risk:

  • Tender annuals like tomatoes, peppers, and basil.
  • Tropical or subtropical houseplants.
  • Young seedlings and new transplants.
  • Budding fruit trees or flowering shrubs in late winter/early spring.

Knowing which plants are vulnerable helps you prioritize protection.


Signs of Frost Damage

Before discussing prevention, it’s important to recognize the symptoms of frost injury:

  • Leaves appear wilted, soggy, or blackened.
  • Stems become soft and weak.
  • Buds may shrivel and fail to bloom.
  • Growth slows down significantly.

If frost damage is mild, some plants may recover, but severe cases often require pruning or replanting.


Effective Ways to Protect Plants from Frost

1. Cover Plants with Protective Materials

Covering plants is one of the most effective and easiest ways to shield them from frost.

  • Use frost cloths, old sheets, blankets, or burlap to trap warmth.
  • Avoid using plastic directly on plants, as it can trap moisture and cause freezing damage.
  • Anchor covers securely so they don’t blow away in the wind.
  • Remove covers in the morning to allow sunlight and airflow.

This method works best for garden beds, shrubs, and small trees.


2. Water Plants Before a Frost

Moist soil retains heat better than dry soil. By watering your plants during the day before a frost is expected, you help the ground release heat slowly overnight. However, avoid overwatering, as soggy soil can harm roots in winter.


3. Mulching to Insulate Roots

Adding a thick layer of mulch around the base of plants protects the root zone from freezing temperatures.

  • Use organic mulches like straw, shredded leaves, wood chips, or compost.
  • Apply 2–4 inches of mulch, but keep it a few inches away from the plant stem to avoid rot.
  • Mulching is especially useful for perennials and shrubs that can regrow from roots in spring.

4. Bring Potted Plants Indoors

If you have container plants, move them indoors or into a greenhouse during frosty nights.

  • Place them near windows for sunlight or under grow lights.
  • Group plants together to create a microclimate of shared warmth.
  • For plants that must remain outdoors, wrap pots with insulating materials like bubble wrap or burlap to protect the roots.

5. Use Cold Frames or Cloches

Cold frames and cloches act like mini-greenhouses, capturing solar heat and shielding plants from frost.

  • A cold frame is a wooden or metal box with a transparent lid (glass or plastic) placed over garden beds.
  • A cloche is a bell-shaped cover made of glass, plastic, or even an upturned jar, used to cover individual plants.

Both options are great for extending the growing season of vegetables like lettuce, spinach, and herbs.


6. Create Windbreaks

Wind intensifies frost damage by carrying away heat from plants.

  • Use temporary barriers such as wooden boards, fences, or burlap screens to shield plants from cold winds.
  • Planting evergreen shrubs or hedges can also serve as long-term natural windbreaks.

7. Apply Row Covers or Tunnels

Row covers are lightweight fabrics that can be draped directly over plants or supported with hoops to form tunnels.

  • They trap heat, reduce frost exposure, and allow water and light penetration.
  • Ideal for protecting vegetable beds during winter or early spring frosts.

8. Heating Solutions for Gardens

For gardeners who experience severe frosts, artificial heating can help:

  • Christmas lights (non-LED) wrapped around shrubs or trees emit gentle heat.
  • Heat lamps or small portable heaters in greenhouses maintain a stable temperature.
  • Always ensure safety by avoiding flammable materials and monitoring heat sources.

9. Pruning and Timing

Avoid pruning plants late in the fall, as this encourages new, tender growth that is highly susceptible to frost. Instead, wait until late winter or spring to prune frost-damaged parts.


10. Choose Cold-Hardy Varieties

When planning your garden, select plants known for cold tolerance. Some vegetables like kale, cabbage, and Brussels sprouts can withstand frost and even taste sweeter after exposure. Cold-hardy perennials and native species are also more resilient.


Long-Term Strategies for Frost Protection

  1. Greenhouses and Polytunnels – Provide year-round frost protection for sensitive plants.
  2. Raised Beds – Warm up faster than ground soil and can be insulated.
  3. Succession Planting – Staggering planting times reduces the risk of losing all crops to unexpected frost.
  4. Weather Monitoring – Stay updated on local frost forecasts and prepare covers or protection in advance.

What to Do If Plants Are Damaged by Frost

Despite your best efforts, some frost damage may occur. Here’s how to help plants recover:

  • Don’t prune immediately – Wait until warmer weather to see which parts survive.
  • Water lightly – Help plants rehydrate but avoid waterlogging.
  • Add compost or fertilizer – Support recovery with nutrients once new growth appears.
  • Protect from further frost – Repeat preventive measures for future cold nights.

Conclusion

Protecting plants from frost during winter may seem challenging, but with proper planning and a few simple techniques, you can minimize damage and keep your garden thriving. From using covers and mulch to creating windbreaks and installing cold frames, these strategies help safeguard vulnerable plants while promoting resilience in the long term.

Remember: prevention is always better than cure. By taking proactive steps before frost strikes, you ensure that your plants not only survive winter but emerge stronger and healthier in spring.

Your garden doesn’t have to go dormant in winter—with the right care, it can stay alive, colorful, and full of promise for the seasons ahead.

How to Grow Onions for a Bountiful Harvest

How to Grow Onions for a Bountiful Harvest

Onions (Allium cepa) are a staple in kitchens worldwide, prized for their flavor, versatility, and long shelf life. Beyond their culinary value, onions are relatively easy to grow in home gardens when proper techniques are followed. Achieving a bountiful onion harvest requires attention to soil preparation, planting methods, watering, fertilization, and pest management.

This article provides a comprehensive guide on how to grow onions successfully, from selecting seeds or sets to harvesting and storage, ensuring robust plants and a plentiful yield.


Why Growing Onions at Home Is Beneficial

Growing onions at home offers numerous advantages:

  1. Freshness and Flavor: Homegrown onions are more flavorful than store-bought varieties.
  2. Variety Selection: Access to unique or heirloom varieties not commonly available in markets.
  3. Cost-Effective: Growing from seeds or sets is cheaper than purchasing mature bulbs.
  4. Nutritional Value: Fresh onions retain more nutrients compared to stored, processed options.
  5. Garden Health: Onions repel certain pests and can be used in companion planting to protect other crops.

Selecting the Right Onion Variety

Onions come in three primary types, each suited for different climates and day lengths:

  • Short-Day Onions: Ideal for southern regions with 10–12 hours of daylight. These onions form bulbs with less sunlight.
  • Long-Day Onions: Suitable for northern regions with 14–16 hours of daylight. They require more sunlight to form bulbs.
  • Intermediate-Day Onions: Adaptable to a range of latitudes and moderate daylight hours.

Tip: Choose varieties that are suited to your region’s day length for optimal bulb development.


Choosing Seeds, Sets, or Transplants

Onions can be grown from:

  1. Seeds: Offer the widest variety options but take longer to mature (100–120 days).
  2. Sets: Small, immature bulbs that produce quick harvests; easier for beginners.
  3. Transplants: Seedlings started indoors and transplanted; a compromise between seeds and sets.

Each method has its benefits, but starting from seeds allows for the most variety and control over the growing process.


Soil Preparation

Onions thrive in well-draining, fertile soil with consistent moisture. Proper soil preparation is essential:

  1. Soil Type: Light, loamy soils are ideal. Heavy clay soils can be amended with sand or compost to improve drainage.
  2. Soil pH: Slightly acidic to neutral (6.0–7.0).
  3. Fertilization: Incorporate compost or well-rotted manure before planting. Avoid excessive nitrogen, which can promote leafy growth at the expense of bulbs.

Tip: Onions have shallow roots, so loose, fertile soil helps bulbs expand and develop fully.


Planting Onions

Planting from Seeds

  • Sow seeds indoors 8–10 weeks before the last frost.
  • Use seed trays with light, well-draining soil.
  • Keep seeds moist and in a warm location (60–70°F / 15–21°C).
  • Transplant seedlings outdoors when 6–8 inches tall, spacing 4–6 inches apart in rows 12–18 inches apart.

Planting from Sets

  • Plant sets 1–2 inches deep with the pointed end up.
  • Space 4–6 inches apart in rows 12–18 inches apart.
  • Cover lightly with soil and water well.

Planting from Transplants

  • Transplants should be planted at the same depth they were growing indoors.
  • Space similarly to seeds or sets.

Tip: Plant onions where they will receive full sun (at least 6–8 hours daily) for optimal growth.


Watering Onions

Onions need consistent moisture for bulb development:

  • Water deeply 1–2 times per week, depending on rainfall.
  • Avoid overhead watering to prevent fungal diseases.
  • Mulch around plants to conserve soil moisture and suppress weeds.

Tip: Keep soil evenly moist but not waterlogged. Fluctuating moisture can cause bulbs to split.


Fertilization

Onions are heavy feeders and benefit from ongoing nutrients:

  • Apply a balanced fertilizer (10-10-10) every 3–4 weeks during early growth.
  • Reduce nitrogen once bulbs start forming to encourage bulb development instead of leafy growth.
  • Side-dress with compost or aged manure if growth appears slow.

Controlling Weeds and Pests

Weeds compete with onions for nutrients and water:

  • Mulch to suppress weed growth.
  • Hand-weed carefully to avoid damaging shallow roots.

Common pests and diseases:

  • Onion maggots: Remove affected bulbs and rotate crops annually.
  • Thrips: Use insecticidal soap if infestations occur.
  • Fungal Diseases: Ensure proper spacing, avoid overhead watering, and rotate crops to prevent onion rot or downy mildew.

Tip: Companion planting with carrots, lettuce, or beets can reduce pest pressure. Avoid planting near legumes.


Supporting Bulb Formation

Onion bulbs develop gradually as the plant matures:

  • Ensure adequate sunlight, as day length influences bulb size.
  • Maintain even watering to prevent splitting or stunted growth.
  • Remove flower stalks (scapes) from long-day varieties to encourage larger bulbs.

Tip: Keep soil loose around developing bulbs to allow expansion and aeration.


Harvesting Onions

Onions are ready for harvest when the tops begin to yellow and fall over:

  1. Gently loosen soil and lift bulbs with a garden fork.
  2. Allow bulbs to cure in a warm, dry, and ventilated area for 2–3 weeks.
  3. Trim roots and foliage after curing.
  4. Store in a cool, dry, dark place to extend shelf life.

Tip: Harvest early for “green onions” or scallions before full bulb development.


Storing Onions

Proper storage ensures onions remain usable for months:

  • Keep bulbs in mesh bags or crates for air circulation.
  • Avoid storing near potatoes, as they release moisture that can cause spoilage.
  • Store in a cool, dry, dark location with temperatures around 32–40°F (0–4°C).

Tips for Maximizing Onion Yield

  1. Use Fertile, Well-Drained Soil: Ensures healthy growth.
  2. Provide Adequate Spacing: Prevents competition and disease spread.
  3. Maintain Consistent Moisture: Promotes bulb formation.
  4. Remove Flower Stalks: Focuses energy on bulb development.
  5. Rotate Crops: Reduces pest and disease buildup in soil.

Final Thoughts

Growing onions successfully requires careful attention from seed or set selection to soil preparation, watering, fertilization, and pest management. Proper spacing, sunlight, and moisture are critical for developing robust bulbs.

By following the steps outlined—choosing the right variety, planting at the correct depth, providing balanced nutrients, and maintaining healthy growing conditions—gardeners can achieve a bountiful onion harvest that provides fresh, flavorful onions for months.

Onions are not just easy-to-grow crops; they are a cornerstone of home gardening that reward patience and care with consistent, productive results. With proper planning and management, your garden can produce healthy, plump onions year after year, ensuring a continuous supply for culinary use, preservation, or sharing with friends and family.

How to Grow Lavender Successfully in Any Climate

How to Grow Lavender Successfully in Any Climate

Lavender (Lavandula spp.) is celebrated worldwide for its fragrant purple blooms, silvery-green foliage, and calming aroma. Its versatility makes it a favorite in home gardens, landscapes, and even culinary and medicinal uses. While lavender is often associated with Mediterranean climates, it can thrive in a wide range of environments if grown correctly.

Successfully growing lavender in any climate requires understanding its natural preferences, proper soil preparation, watering routines, pruning methods, and pest management. By following best practices, gardeners can enjoy healthy lavender plants that produce vibrant flowers and a pleasant scent year after year.

This article provides a comprehensive guide on how to grow lavender successfully, no matter where you live.


Why Lavender Is a Popular Choice

Lavender is more than just a visually appealing plant:

  1. Aesthetic Value: Its purple flowers add color and elegance to gardens and patios.
  2. Fragrance: Lavender’s calming scent is used in essential oils, sachets, and soaps.
  3. Pollinator-Friendly: Lavender attracts bees, butterflies, and other beneficial insects.
  4. Low Maintenance: Once established, it requires minimal care compared to many flowering plants.
  5. Versatility: Can be grown in gardens, containers, or as borders and hedges.

Choosing the Right Lavender Variety

There are many lavender species and cultivars, each suited to different climates and garden purposes:

  • English Lavender (Lavandula angustifolia): Hardy, ideal for colder climates, fragrant flowers.
  • French Lavender (Lavandula dentata): Thrives in warm climates, soft foliage, slightly less hardy.
  • Spanish Lavender (Lavandula stoechas): Unique flower heads, tolerant of heat and coastal winds.
  • Lavandin (Hybrid Lavandula × intermedia): Large plants, vigorous growth, excellent oil production.

Tip: Choose a variety adapted to your climate for best results. English lavender is ideal for cooler regions, while French or Spanish lavender is better for warmer or coastal areas.


Soil Requirements

Lavender thrives in well-draining soil with low to moderate fertility. Proper soil preparation is crucial:

  1. Soil Type: Sandy or gravelly soils are preferred. Heavy clay soils retain too much moisture, which can cause root rot.
  2. pH: Slightly alkaline to neutral (6.5–7.5). If soil is acidic, add lime to adjust the pH.
  3. Amendments: Incorporate sand, perlite, or small gravel into dense soils to improve drainage. Avoid excessive organic matter, which can make soil too rich and promote excessive foliage with fewer flowers.

Tip: Raised beds or containers are excellent options in regions with poor drainage.


Planting Lavender

Step 1: Timing

  • Plant in spring after the last frost in cooler climates.
  • In warm regions, fall planting allows roots to establish before summer heat.

Step 2: Spacing

  • Space plants 12–24 inches apart for small varieties and 24–36 inches for larger types.
  • Adequate spacing ensures good air circulation, reducing fungal issues.

Step 3: Depth

  • Plant so the base of the stem is slightly above soil level to prevent moisture from collecting around the crown.
  • Avoid burying the stem too deeply, which can lead to rot.

Watering Lavender

Lavender is drought-tolerant but requires regular watering during establishment:

  • New Plants: Water once or twice a week until roots are established (3–4 weeks).
  • Established Plants: Water deeply but infrequently, allowing soil to dry between watering.
  • Avoid overwatering, especially in humid climates, as this can lead to root rot.

Tip: Mulch with gravel or small stones to reduce soil moisture around the crown, promoting airflow.


Light Requirements

Lavender thrives in full sun, which ensures strong growth and abundant flowers:

  • Aim for 6–8 hours of direct sunlight daily.
  • In hot climates, afternoon shade can prevent foliage from scorching.
  • In cooler climates, choose a southern-facing spot to maximize sun exposure.

Fertilization

Lavender is a low-nutrient plant and doesn’t require heavy feeding:

  • Apply a balanced, slow-release fertilizer once in spring.
  • Avoid high-nitrogen fertilizers, which encourage leaf growth at the expense of flowers.
  • Organic options like bone meal or composted rock phosphate can support flowering.

Tip: Fertilizing sparingly encourages strong stems and abundant blooms.


Pruning Lavender

Pruning is critical for plant health and structure:

  • Prune annually after flowering or in early spring for English lavender.
  • Remove spent flower stalks and trim about one-third of the plant’s height.
  • Avoid cutting into old, woody stems, as they may not regrow.
  • Proper pruning promotes bushy growth, airflow, and longer plant lifespan.

Pest and Disease Management

Lavender is generally resistant to pests and diseases, but issues may arise under certain conditions:

  • Fungal Diseases: Root rot and gray mold can occur in poorly drained or humid conditions. Ensure good drainage and adequate spacing.
  • Pests: Aphids and spittlebugs occasionally affect lavender. Spray with insecticidal soap if necessary.
  • Prevention: Avoid overhead watering, prune regularly, and maintain good air circulation.

Growing Lavender in Containers

Container growing is ideal for gardeners in cold or wet climates:

  • Use large pots with drainage holes and well-draining soil mix.
  • Bring containers indoors during winter or provide protection from frost.
  • Containers allow you to control soil and moisture conditions more easily.

Tip: Raised containers help prevent standing water and promote root health.


Harvesting Lavender

Lavender can be harvested for decorative, culinary, or aromatic purposes:

  • Harvest flower spikes when the buds are fully formed but not fully open.
  • Cut stems early in the morning after dew has dried for best fragrance.
  • Use fresh flowers, or dry them in bundles in a dark, well-ventilated area.

Tip: Regular harvesting encourages more blooms and prevents plants from becoming too woody.


Climate Considerations

Lavender can be adapted to a range of climates with adjustments:

  • Hot, Dry Climates: Water deeply but infrequently, mulch with gravel, and provide afternoon shade if necessary.
  • Humid Climates: Ensure excellent drainage, increase spacing for airflow, and prune to reduce moisture buildup.
  • Cold Climates: Use hardy varieties like English lavender, mulch heavily, or grow in containers that can be moved indoors.

Final Thoughts

Lavender is a resilient, fragrant, and visually stunning plant that can thrive in almost any climate with proper care. The keys to success are:

  1. Selecting the right variety for your climate.
  2. Providing well-draining soil and adequate sunlight.
  3. Maintaining proper watering and avoiding overwatering.
  4. Pruning annually to maintain shape and encourage blooms.
  5. Adapting care practices to suit local weather conditions.

By following these guidelines, gardeners can grow healthy lavender plants that enhance home gardens with year-round foliage, aromatic fragrance, and vibrant blooms. Whether planted in garden beds, borders, or containers, lavender brings beauty, structure, and a touch of Mediterranean charm to any landscape.

Lavender is not just a plant—it’s an experience, offering visual, aromatic, and practical rewards that make home gardening truly satisfying. With patience and care, you can enjoy thriving lavender plants regardless of your local climate.

Best Depth for Planting Potatoes in Home Gardens

Best Depth for Planting Potatoes in Home Gardens

Potatoes are one of the most versatile and rewarding crops to grow in a home garden. Not only are they a staple food worldwide, but they are also relatively easy to cultivate when proper techniques are followed. Among the many factors that influence a successful potato harvest, planting depth plays a critical role. Planting too shallow or too deep can significantly affect sprout growth, tuber formation, and overall yield.

This article explores the best depth for planting potatoes in home gardens, along with complementary planting tips and soil management techniques, to help gardeners achieve healthy, productive potato crops.


Why Planting Depth Matters

Planting depth is crucial because it influences:

  1. Sprout Emergence: Seeds must have enough soil coverage to protect them from sunlight and temperature fluctuations, yet not so deep that they struggle to reach the surface.
  2. Tuber Development: Potatoes form underground tubers, which require loose, well-aerated soil to expand properly. Planting too deep may delay tuber formation, while shallow planting can lead to green, solanine-rich potatoes exposed to sunlight.
  3. Moisture Retention: Correct depth ensures optimal soil moisture for growth. Too shallow can dry out quickly; too deep can retain excess moisture, causing rot.
  4. Pest and Disease Protection: Proper soil coverage shields the developing tubers from pests, such as wireworms, and diseases like late blight.

Choosing the Right Potato Seed

Before planting, selecting quality seed potatoes is essential:

  • Use certified disease-free seed potatoes from a reputable source.
  • Each seed should be 1–2 inches in size, with at least one or two healthy eyes (sprouts).
  • Cut larger seed potatoes into pieces, ensuring each piece has at least one eye. Allow cut pieces to cure for 1–2 days to form a protective layer over the cut surface.

Soil Preparation

Potatoes prefer loose, well-draining soil with a slightly acidic pH (5.0–6.0). Before planting:

  1. Loosen the Soil: Dig or till soil to a depth of 10–12 inches to allow tubers to expand easily.
  2. Add Organic Matter: Mix compost or well-rotted manure to improve fertility, aeration, and moisture retention.
  3. Create Rows or Mounds: For easier management and better drainage, form rows spaced 24–36 inches apart, or create raised mounds 6–8 inches high.

Determining the Best Planting Depth

The optimal planting depth depends on seed size, soil type, and climate conditions.

General Guidelines:

  • Shallow Planting: 2–3 inches deep
    • Pros: Faster sprout emergence and early harvest.
    • Cons: Tubers may be exposed to sunlight, turning green and bitter.
  • Moderate Planting (Recommended): 4–6 inches deep
    • Pros: Provides sufficient soil coverage for protection and moisture, encourages healthy tuber development.
    • Suitable for most home garden conditions.
  • Deep Planting: 6–8 inches or more
    • Pros: Protects tubers from pests and frost.
    • Cons: Slower sprouting and may reduce early yield in cooler climates.

Tip: In heavier soils, slightly shallower planting is preferred to prevent waterlogging, while sandy soils may benefit from slightly deeper planting to retain moisture.


Planting Technique

  1. Place Seed Potatoes: Lay seed pieces in the prepared furrows with eyes facing upward.
  2. Cover with Soil: Gently cover with 4–6 inches of loose soil (moderate depth).
  3. Watering: Moisten the soil lightly after planting to help sprout emergence. Avoid overwatering, which can cause rot.
  4. Spacing: Leave 12–15 inches between seed pieces within a row.

Hilling for Better Yield

As potato plants grow, hilling—mounding soil around the base—supports tuber development:

  • Begin hilling when sprouts reach 6–8 inches in height.
  • Cover the lower stems and leaves with 2–3 inches of soil.
  • Repeat hilling every 2–3 weeks, creating a mound 8–12 inches high by mid-season.
  • Hilling protects tubers from sunlight, improves drainage, and encourages more tuber formation.

Light, Temperature, and Moisture

Potatoes grow best under the following conditions:

  • Light: Full sun (6–8 hours daily).
  • Temperature: Ideal soil temperature for planting is 45–55°F (7–13°C). Above 80°F (27°C), tuber formation slows.
  • Watering: Keep soil evenly moist. Avoid overwatering to prevent rot. Mulching helps retain moisture and regulate soil temperature.

Common Problems Related to Planting Depth

  • Shallow Planting Issues: Tubers exposed to sunlight turn green and produce solanine, which is toxic. Plants may also be more prone to frost damage.
  • Deep Planting Issues: Slow sprouting and delayed harvest. In cooler climates, deeper planting may hinder tuber formation.
  • Uneven Depth: Some tubers may emerge early while others remain stunted. Maintaining consistent planting depth ensures uniform growth.

Companion Planting and Crop Rotation

Planting depth works best when combined with good garden practices:

  • Companion Plants: Beans, corn, cabbage, and peas improve soil nutrients and deter pests. Avoid planting potatoes near tomatoes, peppers, or eggplants due to shared diseases.
  • Crop Rotation: Rotate potatoes to a different bed each season to reduce disease risk. Avoid planting in the same location for 2–3 years.

Harvesting Potatoes

  • New Potatoes: Can be harvested 10–12 weeks after planting when plants begin flowering.
  • Mature Potatoes: Wait until foliage dies back naturally.
  • Post-Harvest: Cure potatoes in a cool, dark, and dry place for 1–2 weeks to toughen skins and improve storage life.

Tip: Proper planting depth combined with consistent care ensures potatoes are clean, well-formed, and protected from sunlight.


Final Thoughts

The best depth for planting potatoes in home gardens generally ranges from 4 to 6 inches, providing a balance between sprout emergence, tuber protection, and soil moisture retention. Proper depth, combined with quality seed potatoes, well-prepared soil, and consistent care, is key to a healthy and productive harvest.

Potatoes are resilient plants, but attention to detail—especially planting depth—can make the difference between a modest yield and an abundant one. By following these guidelines, gardeners can enjoy homegrown, flavorful potatoes that thrive in any backyard setting.

Planting at the right depth is more than just a technical step; it’s a foundation for success, ensuring your potatoes grow strong, safe, and delicious. With patience, proper soil management, and attention to planting depth, your home garden can produce bountiful potatoes year after year.

How to Grow Tomato Plants from Fresh Seeds

How to Grow Tomato Plants from Fresh Seeds

Tomatoes are among the most rewarding crops a home gardener can grow. Their juicy fruits, vibrant colors, and endless culinary uses make them a staple in kitchens worldwide. While many gardeners buy young tomato seedlings from nurseries, starting your tomato plants from fresh seeds is a highly satisfying and cost-effective way to grow them.

By learning how to grow tomato plants from fresh seeds, you not only save money but also gain access to a wider variety of unique heirloom or specialty tomatoes that may not be available in stores. More importantly, the process allows you to deepen your connection with gardening—from seed to harvest.

This comprehensive guide will take you through each step of the journey, from preparing fresh seeds to nurturing healthy plants and enjoying a bountiful tomato harvest.


Why Grow Tomatoes from Fresh Seeds?

Growing tomatoes from fresh seeds offers several benefits:

  1. Variety Selection: Access to hundreds of heirloom and specialty varieties.
  2. Cost Efficiency: A single tomato provides dozens of seeds—enough for multiple plants.
  3. Sustainability: You can save and replant seeds year after year.
  4. Learning Experience: It’s a hands-on way to understand the plant’s entire life cycle.

Step 1: Extracting Seeds from Fresh Tomatoes

If you want to grow tomatoes from fresh seeds, you’ll first need to prepare them correctly.

How to Extract Seeds:

  1. Slice a ripe tomato in half.
  2. Scoop out the seeds and surrounding gel into a bowl.
  3. Add a little water to the bowl to make stirring easier.
  4. Stir gently to separate seeds from the pulp.

Fermentation Process:

Tomato seeds are covered in a gel coating that inhibits germination. To remove it:

  • Leave the bowl of seeds and pulp uncovered at room temperature for 2–4 days.
  • Stir once daily. A layer of mold may form on top—this is normal.
  • Once the seeds sink to the bottom, they are ready.
  • Rinse thoroughly in a fine sieve and spread on a paper towel or coffee filter to dry for about a week.

Tip: Label the seeds with the tomato variety to avoid confusion later.


Step 2: Preparing for Germination

Once your seeds are clean and dry, it’s time to prepare for planting.

Materials Needed:

  • Seed-starting trays or small pots
  • Seed-starting mix (light, well-draining, sterile)
  • Clear plastic cover or plastic wrap (to retain humidity)
  • Spray bottle for watering

Why Seed-Starting Mix?

Regular garden soil is too heavy and may contain pests or fungi. A seed-starting mix is lightweight and sterile, giving seeds the best chance to sprout.


Step 3: Planting the Seeds

Tomatoes need warmth and consistent moisture to germinate.

Steps for Planting:

  1. Fill trays or pots with moistened seed-starting mix.
  2. Make shallow holes about 1/4 inch deep.
  3. Place one to two seeds per hole.
  4. Cover lightly with soil and gently pat down.
  5. Mist with water to keep the soil moist.
  6. Cover trays with plastic to maintain humidity.

Germination Conditions:

  • Temperature: 70–80°F (21–27°C)
  • Light: Place trays in a bright location or under grow lights.
  • Time: Seeds typically sprout in 5–10 days.

Tip: Remove the plastic cover once seedlings emerge to prevent mold.


Step 4: Caring for Seedlings

Once seedlings sprout, they need attention to grow strong and healthy.

Light:

Tomato seedlings require 14–16 hours of light daily. Without sufficient light, they will become leggy. Place them near a south-facing window or use fluorescent or LED grow lights.

Watering:

Keep the soil consistently moist but not soggy. Overwatering can lead to root rot. Water gently to avoid washing away seedlings.

Air Circulation:

Good airflow helps prevent fungal diseases like damping-off. Use a small fan on low speed near the seedlings if indoors.

Thinning:

If two seedlings grow in the same spot, thin them to one by snipping the weaker one at soil level.


Step 5: Transplanting Seedlings

When seedlings develop their first set of true leaves, they’re ready for transplanting into larger pots.

Steps:

  1. Gently lift seedlings from the tray, holding by the leaves (never the stem).
  2. Replant into pots 3–4 inches wide, burying the stem up to the first leaves to encourage strong root development.
  3. Keep soil moist and provide plenty of light.

Tip: Tomatoes grow roots along buried stems, so deeper planting means sturdier plants.


Step 6: Hardening Off

Before moving seedlings outdoors, they must acclimate to outside conditions. This process is called hardening off.

How to Harden Off:

  • Start 7–10 days before transplanting into the garden.
  • Place seedlings outside in partial shade for 1–2 hours the first day.
  • Gradually increase exposure to sunlight and wind each day.
  • By the end of the week, seedlings should tolerate full sun all day.

Step 7: Transplanting into the Garden

Tomatoes are warm-weather plants, so wait until after the last frost to plant outdoors.

Soil Preparation:

  • Choose a sunny spot (6–8 hours of direct sunlight daily).
  • Amend soil with compost or well-rotted manure for fertility.
  • Ensure soil drains well to prevent waterlogging.

Planting Steps:

  1. Dig holes 18–24 inches apart in rows spaced 3 feet apart.
  2. Place seedlings deep into the soil, burying two-thirds of the stem.
  3. Water thoroughly after planting.
  4. Mulch around plants to retain moisture and suppress weeds.

Step 8: Caring for Mature Tomato Plants

To ensure heavy harvests, tomato plants need ongoing care.

Watering:

  • Water deeply at the base 2–3 times per week.
  • Avoid wetting foliage to prevent fungal diseases.

Staking and Support:

  • Use cages, stakes, or trellises to support vines and keep fruits off the ground.

Fertilizing:

  • Apply a balanced fertilizer every 2–3 weeks.
  • Too much nitrogen encourages leafy growth but fewer fruits. Choose a fertilizer high in phosphorus and potassium.

Pruning:

  • Remove suckers (small shoots between main stem and branches) to focus energy on fruit production.
  • Prune lower leaves to improve airflow and reduce disease risk.

Step 9: Harvesting Tomatoes

Tomatoes are ready for harvest when they reach their mature color—red, yellow, orange, or even purple, depending on the variety.

Harvesting Tips:

  • Pick fruits when fully colored and slightly soft to the touch.
  • Harvest regularly to encourage more fruit production.
  • If frost threatens, pick green tomatoes and ripen indoors in a paper bag.

Common Problems and Solutions

  • Yellow Leaves: May indicate overwatering or nutrient deficiency.
  • Blossom End Rot: Caused by calcium deficiency and irregular watering. Maintain even soil moisture.
  • Pests (aphids, tomato hornworms): Handpick pests or use organic insecticidal soap.
  • Fungal Diseases: Improve air circulation, mulch soil, and avoid overhead watering.

Final Thoughts

Growing tomato plants from fresh seeds is a rewarding process that takes you through every stage of the plant’s life cycle—from the moment you scoop seeds from a ripe fruit to harvesting your own homegrown tomatoes.

The keys to success are:

  • Proper seed preparation through fermentation and drying.
  • Providing warmth, moisture, and light for germination.
  • Hardening off before transplanting.
  • Consistent care with watering, feeding, pruning, and pest management.

By following these steps, you can transform a single tomato into a thriving garden full of fruitful plants. Not only will you enjoy the satisfaction of growing from seed, but you’ll also savor the unbeatable taste of fresh, homegrown tomatoes straight from your garden.

5 Evergreen Plants That Add Structure to Landscapes

5 Evergreen Plants That Add Structure to Landscapes

When designing a garden or landscape, structure is as important as color. Flowers come and go with the seasons, but evergreen plants provide the backbone of the garden, ensuring year-round beauty and form. They keep their foliage all year, offering color, texture, and definition—even in the depths of winter when other plants have gone dormant.

Evergreens are not just background fillers; they are essential elements in landscape design. They provide privacy, serve as natural windbreaks, define borders, and bring a sense of permanence and stability to outdoor spaces. With thoughtful placement, evergreen plants can transform any yard into a structured, balanced, and inviting landscape.

Here, we’ll explore five evergreen plants that add structure and appeal to gardens of all sizes. Each plant has been chosen for its resilience, visual impact, and versatility in landscaping.


1. Boxwood (Buxus sempervirens)

The classic boxwood is one of the most versatile evergreen shrubs, prized for its dense growth and ability to be shaped into hedges, spheres, or topiaries.

Features:

  • Height/Spread: Varies from compact 2–3 feet to larger 10-foot varieties.
  • Foliage: Small, glossy, deep green leaves that stay vibrant year-round.
  • Growth Habit: Dense and slow-growing, perfect for formal gardens.

Why It’s Perfect for Structure:

Boxwoods are unmatched when it comes to providing geometric definition in the landscape. They’re often used to line walkways, frame entrances, or create structured parterres in formal gardens. Their evergreen nature ensures that the structure remains visible even in winter.

Care Tips:

  • Thrives in full sun to partial shade.
  • Requires well-drained soil but is adaptable.
  • Regular pruning helps maintain shape and density.

Design Idea: Use boxwoods to create low hedges around flower beds. When seasonal blooms fade, the evergreen outline keeps the garden structured.


2. Holly (Ilex spp.)

With glossy leaves and bright berries, holly offers both structure and seasonal interest.

Features:

  • Height/Spread: Ranges from dwarf shrubs (2–4 feet) to large trees (over 40 feet).
  • Foliage: Thick, shiny, often spiny leaves that remain green all year.
  • Special Feature: Female plants produce bright red berries in winter when pollinated by a nearby male.

Why It’s Perfect for Structure:

Holly’s dense foliage makes it ideal for hedges, privacy screens, and foundation plantings. It provides visual weight in the landscape, anchoring softer plantings. In winter, when many plants are bare, holly shines with festive berries and deep green leaves.

Care Tips:

  • Prefers full sun to partial shade.
  • Grows best in slightly acidic, well-drained soil.
  • Prune in late winter or early spring to shape and encourage bushiness.

Design Idea: Use holly as a living fence. Its evergreen leaves provide privacy, while the berries attract birds and add winter color.


3. Juniper (Juniperus spp.)

Junipers are incredibly diverse evergreens, ranging from groundcovers to tall trees. Their hardy nature and variety make them indispensable for structured landscapes.

Features:

  • Height/Spread: From creeping varieties only a few inches tall to upright forms reaching 20 feet or more.
  • Foliage: Needle-like or scale-like leaves in shades of green, blue, or gold.
  • Special Feature: Many varieties produce attractive blue berries.

Why It’s Perfect for Structure:

Junipers are excellent for groundcover, hedging, and focal points. Their evergreen needles and wide range of growth habits allow them to fill structural roles—from edging garden beds to anchoring large landscape designs. Blue or gold varieties add unique color contrast to traditional greenery.

Care Tips:

  • Thrives in full sun.
  • Extremely drought-tolerant and low maintenance.
  • Requires well-drained soil; avoid waterlogged areas.

Design Idea: Use creeping junipers to cover slopes or bare patches. They provide erosion control while adding lush greenery year-round.


4. Yew (Taxus baccata and hybrids)

Yews are timeless evergreens with dense, dark foliage and a long history in formal garden design.

Features:

  • Height/Spread: From compact shrubs to tall trees up to 50 feet.
  • Foliage: Dark green, needle-like leaves.
  • Special Feature: Female plants bear red, berry-like fruits (arils).

Why It’s Perfect for Structure:

Yews are extremely tolerant of pruning, making them ideal for hedges, topiary, and architectural shapes. Their dense growth creates strong visual lines in the garden. They are also long-lived, providing structure for generations.

Care Tips:

  • Prefers partial shade to full sun.
  • Grows well in well-drained soil but is tolerant of various conditions.
  • Prune annually to maintain desired shape.

Design Idea: Plant yews as tall, dense hedges along property borders for privacy. Their evergreen foliage forms a living wall that stands strong all year.


5. Rhododendron (Rhododendron spp.)

While often grown for their spectacular flowers, many rhododendrons are evergreen, making them valuable structural plants as well.

Features:

  • Height/Spread: Most varieties range from 4–10 feet tall.
  • Foliage: Large, leathery green leaves that persist through winter.
  • Flowers: Blooms in spring with clusters of pink, purple, red, or white flowers.

Why It’s Perfect for Structure:

Rhododendrons provide a lush, leafy framework in landscapes. Even after flowering, their broad leaves keep the garden green and full. They are especially effective in shaded areas, where many other evergreens struggle.

Care Tips:

  • Thrive in partial shade.
  • Require acidic, well-drained soil rich in organic matter.
  • Mulch roots to retain moisture and protect from temperature fluctuations.

Design Idea: Use rhododendrons as foundation shrubs near the home. Their evergreen foliage softens building lines, and spring flowers bring seasonal delight.


Designing with Evergreen Plants

Evergreen plants serve as the bones of the garden, creating form and stability. To maximize their impact:

  1. Balance Size and Scale – Use tall evergreens like yews for background structure and smaller ones like boxwoods for edging.
  2. Mix Textures and Colors – Combine glossy holly with fine-needled juniper for contrast.
  3. Provide Seasonal Interest – Choose plants that also offer berries, blooms, or colorful foliage.
  4. Use as Focal Points – A single specimen, like a sculpted yew or flowering rhododendron, can anchor a design.
  5. Ensure Year-Round Appeal – Strategically place evergreens where they’ll be visible in winter, such as near entryways or along pathways.

Final Thoughts

Evergreen plants are essential for any well-designed landscape. They provide structure, consistency, and visual appeal no matter the season. While flowers and deciduous plants bring temporary beauty, evergreens serve as the permanent framework that holds the garden together.

From the formal elegance of boxwood hedges to the lush greenery of rhododendrons, these plants ensure your landscape remains vibrant year-round. By carefully selecting and placing evergreens like boxwood, holly, juniper, yew, and rhododendron, you can design an outdoor space that is not only beautiful but also enduring and balanced.

Incorporating evergreens is more than a design choice—it’s a way of giving your garden longevity, structure, and timeless appeal. Whether you want privacy, formality, or simply year-round greenery, these five evergreen plants will bring lasting structure to your landscape.

5 Striking Black-Flower Plants That Add Mystery to Your Garden

5 Striking Black-Flower Plants That Add Mystery to Your Garden

Gardens are often filled with vibrant hues of red, yellow, pink, and purple—but what if you could introduce an element of mystery, elegance, and drama to your outdoor space? Black-flower plants are a rare and captivating choice that can instantly transform the atmosphere of your garden. While these flowers aren’t truly black (they are deep shades of maroon, purple, or burgundy), their appearance is so striking that they create the illusion of velvety black. They stand out beautifully when paired with lighter blooms and greenery, giving your garden a bold, gothic, or even fairytale-like feel.

If you want to add something truly unique to your garden, here are five stunning black-flower plants you can grow with ease. Each plant not only adds visual depth but also enhances the overall charm of your landscape.


1. Black Tulip (Tulipa ‘Queen of Night’)

The Queen of Night tulip is perhaps one of the most iconic black flowers in the gardening world. With its deep purple petals that appear almost jet-black in the right lighting, it adds a touch of sophistication to spring gardens.

  • Why it’s stunning: The velvety texture and near-black color make it a showstopper when planted in clusters or borders.
  • Growing conditions:
    • Light: Prefers full sun to partial shade.
    • Soil: Well-drained, fertile soil is best.
    • Watering: Moderate watering; avoid soggy soil to prevent bulb rot.
  • Care tips: Plant tulip bulbs in the fall (before the first frost) about 6–8 inches deep. Combine with white or yellow tulips for a dramatic contrast in spring.
  • Special feature: These tulips bloom in late spring, giving your garden an enchanting, moody atmosphere during the season of renewal.

2. Black Calla Lily (Zantedeschia ‘Black Star’)

Calla lilies are already known for their elegant trumpet-like blooms, and the Black Star calla lily takes that elegance to another level. Its dark maroon-to-black flowers paired with green leaves create a stunning focal point in garden beds or containers.

  • Why it’s stunning: Its exotic appearance and unique bloom shape make it a luxurious addition to modern or traditional gardens.
  • Growing conditions:
    • Light: Thrives in full sun to partial shade.
    • Soil: Moist, well-drained soil enriched with compost.
    • Watering: Keep the soil consistently moist, especially during the growing season.
  • Care tips: Plant rhizomes in spring once the soil warms up. Deadhead spent blooms to encourage more flowers and prevent energy loss.
  • Special feature: Can also be grown indoors in containers, making it versatile for both gardens and homes.

3. Black Hollyhock (Alcea rosea ‘Nigra’)

For those who love tall, statement plants, the Black Hollyhock is a must-have. This biennial or short-lived perennial can grow up to 6–8 feet tall, producing dramatic, nearly black blooms along towering stalks.

  • Why it’s stunning: The height and rich color of the flowers make it perfect for creating a striking backdrop in cottage gardens.
  • Growing conditions:
    • Light: Full sun is ideal.
    • Soil: Fertile, well-drained soil with plenty of organic matter.
    • Watering: Regular watering is needed, especially in dry spells.
  • Care tips: Hollyhocks are prone to rust (a common fungal disease), so ensure good air circulation. Plant them near fences or walls for support.
  • Special feature: Black hollyhocks attract bees, butterflies, and hummingbirds, making them both mysterious and pollinator-friendly.

4. Black Iris (Iris chrysographes)

The Black Iris, also called the “Black Siberian Iris,” is an exquisite perennial with sword-like leaves and deep velvety flowers that bloom in late spring to early summer. Its dramatic appearance adds luxury to borders and water garden edges.

  • Why it’s stunning: Its dark, velvety petals with subtle purple undertones look regal and pair well with lighter perennials.
  • Growing conditions:
    • Light: Prefers full sun but tolerates partial shade.
    • Soil: Moist, well-drained soil; thrives near water features.
    • Watering: Needs consistent watering, especially during the blooming period.
  • Care tips: Divide rhizomes every 3–4 years to prevent overcrowding. Add mulch to retain soil moisture.
  • Special feature: Symbolizes elegance and mystery, often used in high-end floral arrangements.

5. Bat Flower (Tacca chantrieri)

For gardeners who love the unusual, the Bat Flower is a rare exotic plant that truly stands out. Its large, bat-shaped black blossoms, accompanied by long whisker-like bracts, give it an otherworldly charm.

  • Why it’s stunning: Its eerie, bat-like shape makes it one of the most unique black-flower plants in existence.
  • Growing conditions:
    • Light: Prefers bright, indirect sunlight (ideal for shaded gardens or indoors).
    • Soil: Rich, well-drained soil with high humidity.
    • Watering: Needs consistently moist soil; never let it dry out completely.
  • Care tips: This tropical plant thrives in warm, humid environments, so misting or a humidifier is recommended when grown indoors.
  • Special feature: Often considered a collector’s plant due to its exotic rarity and unusual appearance.

Tips for Designing with Black-Flower Plants

  • Contrast is key: Black flowers pop when paired with white, yellow, or pastel-colored blooms.
  • Mix textures: Combine velvety black flowers with ornamental grasses or silver foliage for a dramatic effect.
  • Create focal points: Use black-flower plants as centerpieces in flower beds or containers to draw attention.
  • Balance mystery with light: Too many dark blooms can make a garden look heavy, so mix them strategically with vibrant plants.

Conclusion

Adding black-flower plants to your garden is a bold design choice that can completely transform the space from ordinary to extraordinary. From the elegant Black Tulip and Calla Lily to the dramatic Black Hollyhock and Iris, and the exotic Bat Flower, each plant brings its own unique charm and mystery. By combining these striking blooms with lighter flowers and lush greenery, you can create a truly captivating garden that reflects sophistication, mystery, and creativity.

Whether you’re an experienced gardener or just starting your journey, these five striking black-flower plants will not only enrich your outdoor space but also leave your visitors in awe.

Step-by-Step Guide to Growing Cucumbers in Your Garden

Step-by-Step Guide to Growing Cucumbers in Your Garden

Cucumbers are one of the most rewarding vegetables to grow in a home garden. Crisp, refreshing, and versatile, they are perfect for salads, pickles, and snacks. Growing cucumbers is easier than you might think, and with the right care, they can provide a generous harvest throughout the growing season. Whether you’re a beginner gardener or someone looking to refine your skills, this step-by-step guide will help you grow cucumbers successfully in your garden.


Why Grow Cucumbers at Home?

Before diving into the steps, let’s quickly understand why cucumbers are worth planting in your backyard:

  • Fast growers: Cucumbers grow quickly, meaning you’ll see results within weeks.
  • High yields: A single plant can produce dozens of cucumbers in one season.
  • Nutritional value: Cucumbers are rich in water, vitamins K and C, potassium, and antioxidants.
  • Versatile use: Fresh eating, pickling, juicing, or even beauty treatments — cucumbers have endless uses.

Step 1: Choosing the Right Cucumber Variety

Cucumbers come in many varieties, so it’s important to choose the one that best fits your needs and space.

  1. Slicing cucumbers – Large, smooth, and perfect for salads and sandwiches.
  2. Pickling cucumbers – Smaller, crunchy, and ideal for making pickles.
  3. Burpless cucumbers – Mild in flavor and easier to digest.
  4. Bush varieties – Compact, suitable for containers or small gardens.
  5. Climbing/vining cucumbers – Require trellises but save space and produce high yields.

Tip: If you have limited garden space, bush cucumbers or container-friendly varieties are your best choice.


Step 2: Preparing the Soil

Cucumbers thrive in well-drained, fertile soil that is rich in organic matter.

  • Soil pH: 6.0 to 7.0 is ideal.
  • Preparation: Loosen the soil to about 12 inches deep and mix in compost or well-rotted manure.
  • Drainage: Avoid soggy soil as cucumbers are prone to root rot. Raised beds or mounds work well.

Pro Tip: Adding organic compost improves soil fertility and helps cucumbers grow sweeter and juicier.


Step 3: Planting Cucumbers

Cucumbers are warm-season crops and cannot tolerate frost.

  • Timing: Plant seeds outdoors 2 weeks after the last frost date, when soil is at least 65°F (18°C).
  • Spacing:
    • Bush varieties: 1–2 feet apart.
    • Vining varieties: 3–4 feet apart, with a trellis for climbing.
  • Depth: Sow seeds 1 inch deep.
  • Transplants: If starting indoors, transplant seedlings carefully to avoid disturbing their roots.

Tip: Plant in mounds or hills of soil, placing 3–4 seeds per hill. This method helps improve drainage and warmth.


Step 4: Watering and Mulching

Cucumbers are made up of 95% water, so consistent watering is crucial.

  • Watering schedule: 1–2 inches of water per week. Increase during hot, dry periods.
  • Method: Water at the base, not on the leaves, to prevent fungal diseases.
  • Mulching: Apply a 2–3 inch layer of straw, leaves, or compost around the plants to retain soil moisture and suppress weeds.

Pro Tip: Uneven watering can cause cucumbers to taste bitter. Keep the soil evenly moist for the best flavor.


Step 5: Supporting Your Plants

For vining cucumbers, providing support helps save space, improve airflow, and produce straighter fruits.

  • Trellises: Wooden or metal trellises allow vines to climb vertically.
  • Cages: Tomato cages also work well.
  • Netting: A simple net tied between two poles is an easy solution.

Growing cucumbers vertically not only reduces pest problems but also makes harvesting easier.


Step 6: Fertilizing Cucumbers

Cucumbers are heavy feeders and benefit from regular fertilization.

  • Before planting: Mix compost or balanced fertilizer (10-10-10) into the soil.
  • During growth: Apply liquid fertilizer or compost tea every 2–3 weeks.
  • Flowering stage: Switch to a fertilizer with more potassium and phosphorus to boost fruit production.

Tip: Avoid too much nitrogen, as it encourages leafy growth at the expense of fruits.


Step 7: Managing Pests and Diseases

Like all garden plants, cucumbers can face pest and disease problems.

Common Pests:

  • Cucumber beetles – Yellow-green beetles that chew leaves and spread bacterial wilt.
  • Aphids – Tiny insects that suck plant sap.
  • Spider mites – Cause yellow speckling on leaves.

Solutions:

  • Handpick beetles or use floating row covers.
  • Spray neem oil or insecticidal soap for aphids.
  • Encourage beneficial insects like ladybugs.

Common Diseases:

  • Powdery mildew – White coating on leaves.
  • Downy mildew – Yellow spots on leaves.
  • Bacterial wilt – Causes wilting of the entire plant.

Prevention: Space plants properly, water at the base, and rotate crops yearly.


Step 8: Harvesting Cucumbers

Harvesting at the right time ensures crisp, flavorful cucumbers.

  • Timing: Cucumbers are ready to pick 50–70 days after planting, depending on the variety.
  • Signs of readiness:
    • Slicing cucumbers: 6–8 inches long.
    • Pickling cucumbers: 2–4 inches long.
    • Avoid yellowing, as it means overripe cucumbers.
  • Harvesting method: Use scissors or a knife to cut cucumbers from the vine, leaving a short stem attached.

Tip: Check daily during harvest season. Regular picking encourages continuous production.


Step 9: Storing Cucumbers

Cucumbers are best eaten fresh but can also be stored or preserved.

  • Fresh storage: Keep in the refrigerator for up to 1 week.
  • Pickling: Preserve cucumbers in vinegar and spices for long-term use.
  • Freezing: Not recommended as cucumbers lose their crispness.

Extra Tips for Successful Cucumber Growing

  1. Companion planting: Grow cucumbers alongside beans, peas, lettuce, and radishes. Avoid planting near potatoes or sage.
  2. Succession planting: Plant new seeds every 2–3 weeks for continuous harvests.
  3. Shade in hot climates: In very hot regions, provide partial shade to prevent bitterness.
  4. Pollination support: Encourage bees and pollinators by planting flowers nearby.

Conclusion

Growing cucumbers in your garden is a simple, rewarding process when done step by step. From selecting the right variety and preparing the soil to watering, fertilizing, and harvesting, each stage plays a vital role in ensuring a healthy and abundant harvest. With consistent care, you’ll enjoy crisp, delicious cucumbers throughout the season, fresh from your own backyard.

Whether you love them in salads, pickled in jars, or eaten straight off the vine, cucumbers are a must-have in any garden. So grab some seeds, prepare your garden bed, and get ready to enjoy the refreshing taste of homegrown cucumbers!

How to Harvest Basil the Right Way for Best Flavor

How to Harvest Basil the Right Way for Best Flavor

Basil (Ocimum basilicum) is one of the most beloved herbs in the world. From Italian pastas and pizzas to Thai curries and refreshing summer drinks, basil adds a unique aroma and flavor that instantly elevates any dish. For home gardeners, growing basil is easy and rewarding—but the real secret to enjoying basil at its best lies in harvesting it the right way.

Harvesting basil may seem as simple as plucking a few leaves, but improper harvesting can lead to bitter-tasting leaves, a weakened plant, and a shorter lifespan. On the other hand, harvesting correctly encourages the plant to grow bushier, produce more leaves, and maintain its signature sweet, fragrant flavor.

In this article, we’ll explore when, how, and how often to harvest basil so you can enjoy the freshest, most flavorful leaves all season long.


Why Harvesting Basil the Right Way Matters

Many beginner gardeners are surprised to learn that how you harvest basil directly impacts its growth and taste. Here’s why proper harvesting is essential:

  • Enhances Flavor: Young, tender basil leaves contain the highest concentration of essential oils, which give basil its sweet and aromatic flavor.
  • Encourages Growth: Harvesting correctly stimulates branching, leading to a fuller, bushier plant instead of one tall, leggy stem.
  • Prevents Bolting: Regular harvesting discourages the plant from producing flowers too soon. Flowering reduces the flavor and tenderness of basil leaves.
  • Extends Harvest Season: With proper care, a single basil plant can provide fresh leaves throughout the growing season.

When to Harvest Basil for Best Flavor

Timing is everything when it comes to basil.

  1. First Harvest: Begin harvesting when the plant is at least 6–8 inches tall and has developed 6–8 healthy leaves. This usually occurs about 3–4 weeks after planting.
  2. Best Time of Day: Harvest basil in the morning, after the dew has dried but before the sun is at its peak. This is when essential oil concentration in the leaves is highest, giving you maximum flavor and aroma.
  3. Leaf Age: Young, tender leaves (near the top of the plant) are more flavorful and aromatic than older, lower leaves.
  4. Avoid Flowering Stage: Once basil starts to flower, leaves may turn bitter. Pinch off flower buds as soon as they appear to preserve leaf quality.

Tools You Need

While basil can be harvested simply by pinching leaves with your fingers, using the right tools can help keep the plant healthy:

  • Clean, Sharp Scissors or Pruning Shears: For cutting stems without tearing.
  • Your Hands: For gently pinching off young leaves and flower buds.
  • Harvesting Basket: To collect your leaves without crushing them.

Always sanitize scissors or shears before use to avoid transferring diseases between plants.


Step-by-Step Guide to Harvesting Basil the Right Way

1. Identify the Right Spot to Cut

  • Look for a set of leaves where two new small leaves are growing at the junction (called a “leaf node”).
  • Cut or pinch the stem just above this node.

This encourages the plant to branch out at that point, producing two new stems instead of one.

2. Pinch, Don’t Strip

  • Avoid stripping individual leaves from the lower stem unless absolutely necessary.
  • Instead, harvest by cutting stems, which stimulates growth and keeps the plant balanced.

3. Take No More Than One-Third of the Plant

  • Harvest up to one-third of the plant at a time.
  • Taking too many leaves can shock the plant and slow regrowth.

4. Regular Harvesting

  • Harvest basil every 1–2 weeks to keep the plant productive.
  • Frequent harvesting prevents the plant from becoming tall and spindly.

5. Remove Flower Buds Immediately

  • As soon as you see flower buds forming, pinch them off.
  • This redirects the plant’s energy into leaf production rather than seed formation.

How Often Should You Harvest Basil?

  • Light Harvesting: Pinch off a few leaves as needed for cooking. This can be done daily without harm.
  • Heavy Harvesting: For larger quantities, harvest stems every 7–10 days, allowing time for regrowth.
  • Peak Growing Season: During warm months, basil grows rapidly, so you may harvest more frequently.

Post-Harvest Handling for Best Flavor

Proper handling after harvest ensures that basil retains its aroma and taste.

Washing

  • Gently rinse basil leaves in cool water to remove dust or insects.
  • Pat dry with a soft cloth or use a salad spinner to prevent bruising.

Storing Fresh Basil

  • Short-Term Storage: Place basil stems in a glass of water like cut flowers, and leave them at room temperature. Cover loosely with a plastic bag for freshness.
  • Refrigeration: Basil is sensitive to cold and may turn black in the fridge. If refrigeration is necessary, wrap leaves in a slightly damp paper towel and place them in a perforated plastic bag.
  • Freezing: Chop basil leaves and freeze them in ice cube trays with olive oil or water. This preserves flavor for months.

Drying Basil

  • Hang stems upside down in a dry, airy spot out of direct sunlight.
  • Alternatively, use a food dehydrator.
  • Dried basil loses some aroma compared to fresh, but it’s still excellent for seasoning.

Common Mistakes to Avoid When Harvesting Basil

  1. Harvesting Too Early: Cutting before the plant is established weakens growth.
  2. Taking Too Many Leaves at Once: Over-harvesting stresses the plant and reduces yield.
  3. Allowing Flowers to Develop: This makes leaves bitter and tough.
  4. Cutting Too Low: Harvesting near the soil level can stunt growth or kill the plant.
  5. Storing Improperly: Refrigerating unprotected leaves often leads to blackened, wilted basil.

Tips to Maximize Basil Flavor

  • Consistent Watering: Water basil regularly, but don’t overwater. Well-hydrated plants produce sweeter leaves.
  • Adequate Sunlight: Basil thrives with 6–8 hours of direct sunlight daily.
  • Fertilize Lightly: Too much fertilizer encourages leaf growth but dilutes flavor. Use balanced, organic fertilizers sparingly.
  • Companion Planting: Plant basil near tomatoes and peppers—it enhances their flavor and repels pests like aphids and mosquitoes.

Using Freshly Harvested Basil

Harvesting basil is only half the joy—the other half is using it! Here are some delicious ways to enjoy your fresh harvest:

  • Culinary Delights: Make pesto, caprese salad, basil butter, or fresh pasta sauces.
  • Infused Oils and Vinegars: Store basil leaves in olive oil or vinegar for aromatic infusions.
  • Herbal Teas: Basil tea aids digestion and relieves stress.
  • Natural Remedies: Basil leaves contain antioxidants and anti-inflammatory compounds beneficial for health.

Final Thoughts

Harvesting basil the right way is both an art and a science. By pinching stems just above leaf nodes, avoiding over-harvesting, and removing flowers promptly, you’ll keep your basil plants healthy, bushy, and bursting with flavor. Timing also matters—morning harvests yield the most aromatic leaves, while proper storage ensures that flavor lasts long after picking.

With these techniques, a single basil plant can supply you with fragrant, flavorful leaves all season long. Whether you’re crafting homemade pesto, sprinkling fresh leaves on pizza, or brewing a calming tea, you’ll appreciate the difference that comes from harvesting basil the right way.

So next time you step into your garden, remember: every careful harvest not only gives you better flavor but also rewards you with a thriving, productive plant.