5 Stunning Salvia Plants to Brighten Up Your Garden

5 Stunning Salvia Plants to Brighten Up Your Garden

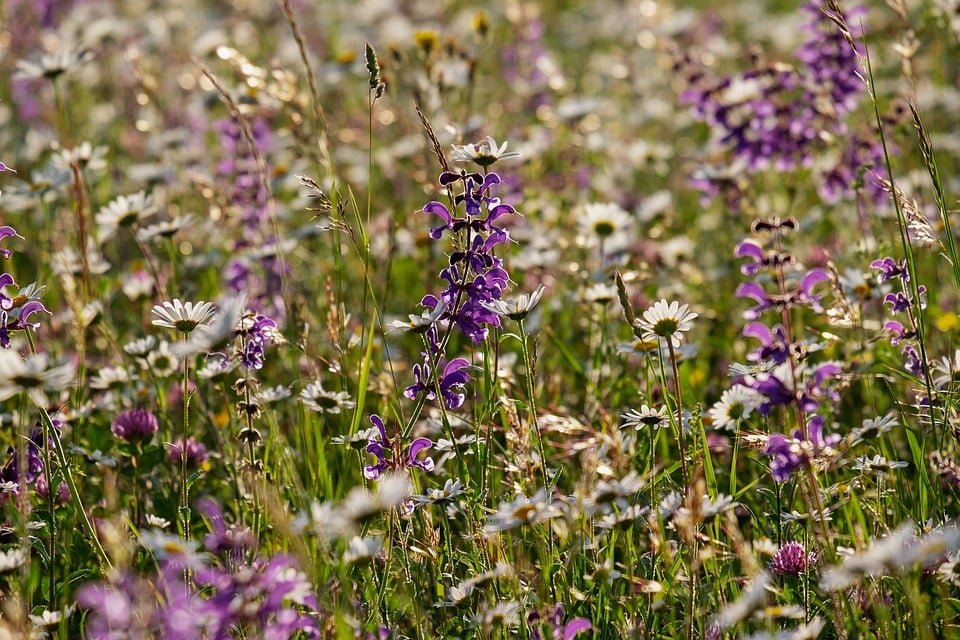
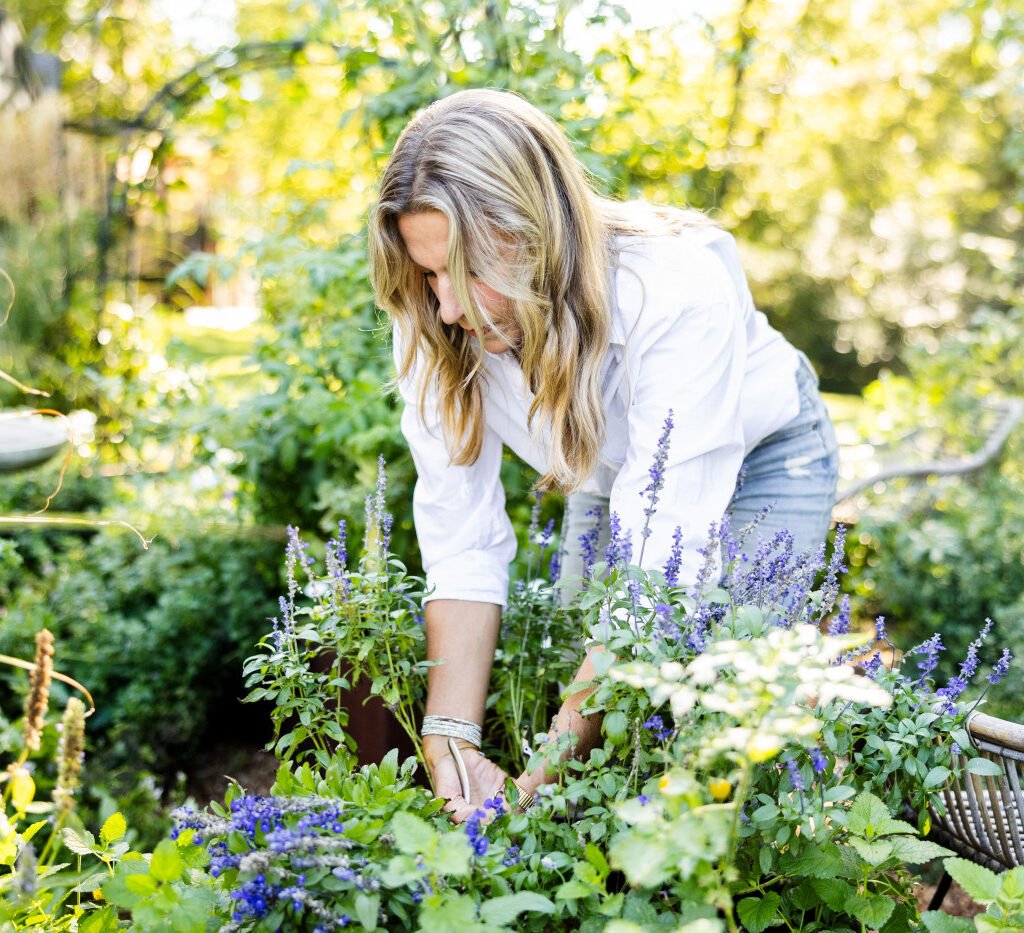
If you’re looking for a way to add bursts of color, fragrance, and pollinator-friendly blooms to your garden, salvia plants are the perfect choice. Belonging to the mint family (Lamiaceae), salvias are renowned for their vibrant flowers, aromatic foliage, and versatility in both ornamental and functional gardens. They’re hardy, drought-tolerant, and easy to grow—qualities that make them favorites among gardeners worldwide.

With over 900 species in the Salvia genus, there’s something for everyone, from tall flowering varieties for dramatic borders to compact ones perfect for containers. In this article, we’ll highlight five stunning salvia plants that will instantly brighten up your garden, along with detailed growing tips to help you cultivate them successfully.


Why Grow Salvia in Your Garden?

Before diving into the top varieties, here’s why salvias deserve a place in your landscape:

  • Colorful Displays: Their long-lasting blooms range from deep blues and purples to reds, pinks, and whites.
  • Pollinator Magnets: Salvias attract bees, butterflies, and hummingbirds, boosting biodiversity.
  • Low Maintenance: Drought-tolerant and adaptable to various soils, they’re easy to care for.
  • Long Blooming Season: Many varieties flower from late spring through fall.
  • Versatility: Ideal for borders, cottage gardens, wildflower patches, or container displays.

1. Salvia nemorosa (Wood Sage) – A Classic Cottage Garden Favorite

Salvia nemorosa, commonly known as wood sage, is a perennial beauty that thrives in temperate gardens. Its upright flower spikes and rich purple-blue blooms make it a standout in borders and mixed beds.

Key Features:

  • Compact growth habit, typically 1–2 feet tall.
  • Dense spikes of violet-purple flowers that bloom from late spring to early fall.
  • Fragrant foliage that enhances the sensory appeal of your garden.

Why It Brightens Gardens:

The intense purple-blue flowers create vibrant contrasts against green foliage and pair beautifully with roses, daisies, and ornamental grasses. Its long bloom time ensures continuous color throughout the summer.

Growing Tips:

  • Prefers full sun but tolerates partial shade.
  • Well-drained soil is essential to prevent root rot.
  • Deadhead spent flowers regularly to encourage reblooming.
  • Hardy in USDA zones 4–9, making it suitable for many climates.

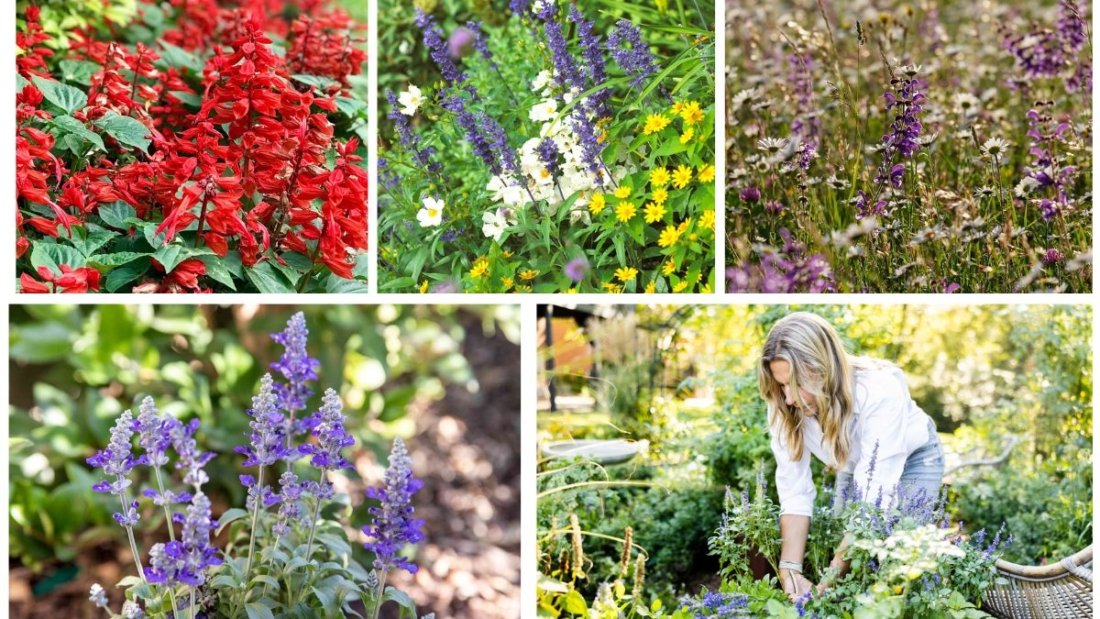
2. Salvia splendens (Scarlet Sage) – A Burst of Fiery Red

If you want a dramatic splash of red in your garden, Salvia splendens is the plant to choose. Known as scarlet sage, this annual salvia is a favorite for flower beds, borders, and containers.

Key Features:

  • Grows 1–3 feet tall, with bright scarlet-red flower spikes.
  • Compact, bushy growth habit, perfect for formal displays.
  • Blooms continuously from summer until frost.

Why It Brightens Gardens:

The vibrant red blooms of scarlet sage create an eye-catching focal point. It pairs beautifully with yellow marigolds or blue salvia varieties for a bold color scheme.

Growing Tips:

  • Needs full sun for best flowering results.
  • Thrives in rich, moist, well-drained soil.
  • Deadheading promotes continuous blooming.
  • Popular in USDA zones 10–11, but grown as an annual in cooler climates.

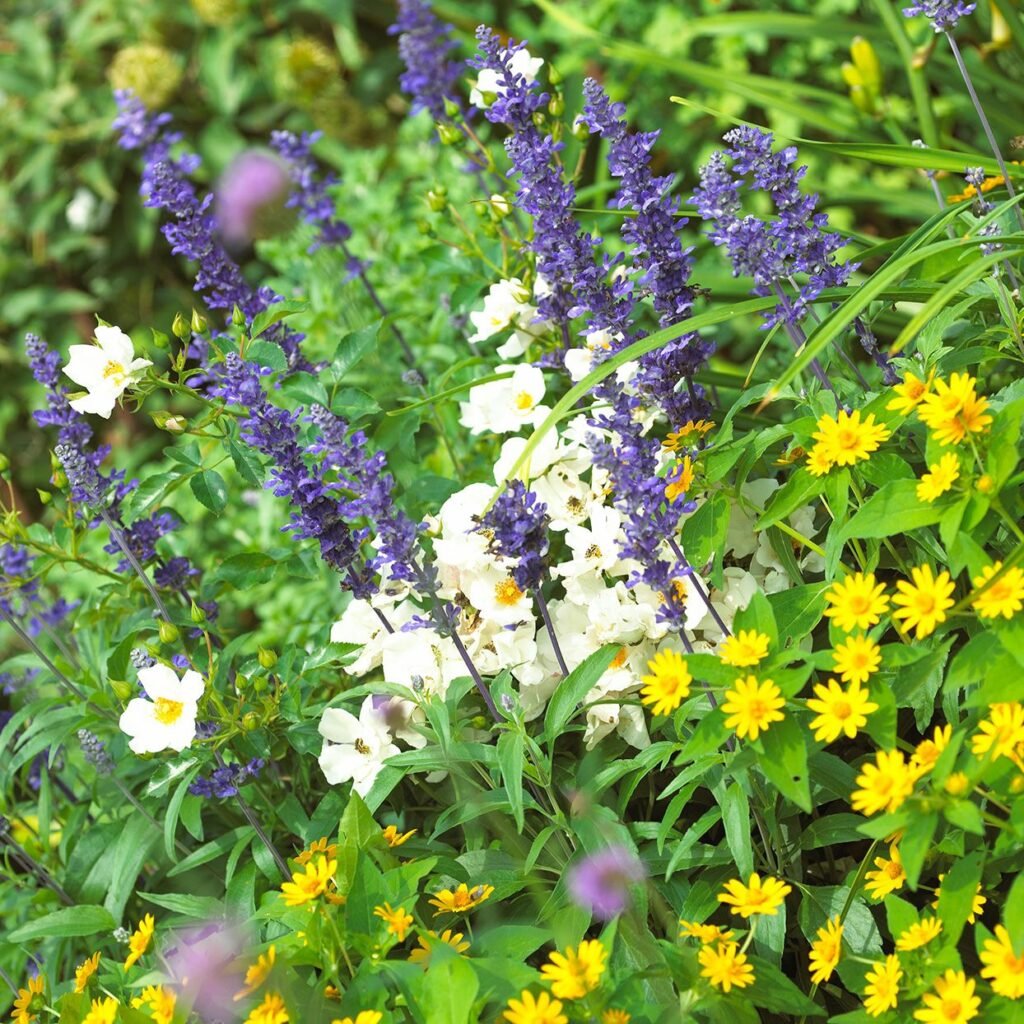
3. Salvia guaranitica (Anise-Scented Sage) – A Pollinator’s Delight

Salvia guaranitica, often called anise-scented sage, is treasured for its striking deep blue flowers and aromatic leaves. This salvia is particularly loved by hummingbirds, making it a lively addition to wildlife gardens.

Key Features:

  • Grows up to 3–5 feet tall, with loose, airy flower spikes.
  • Produces tubular, cobalt-blue blooms with black calyxes.
  • Aromatic foliage with a faint licorice scent.

Why It Brightens Gardens:

Its dramatic blue flowers add elegance and depth to garden beds. Combined with its tall, upright growth, it creates a strong vertical accent. It’s also a magnet for pollinators, ensuring your garden buzzes with life.

Growing Tips:

  • Prefers full sun but tolerates partial shade.
  • Needs fertile, moist, well-drained soil.
  • Cut back after flowering to encourage bushier growth.
  • Best grown in USDA zones 7–10.

4. Salvia farinacea (Mealycup Sage) – Long-Lasting Blue Blooms

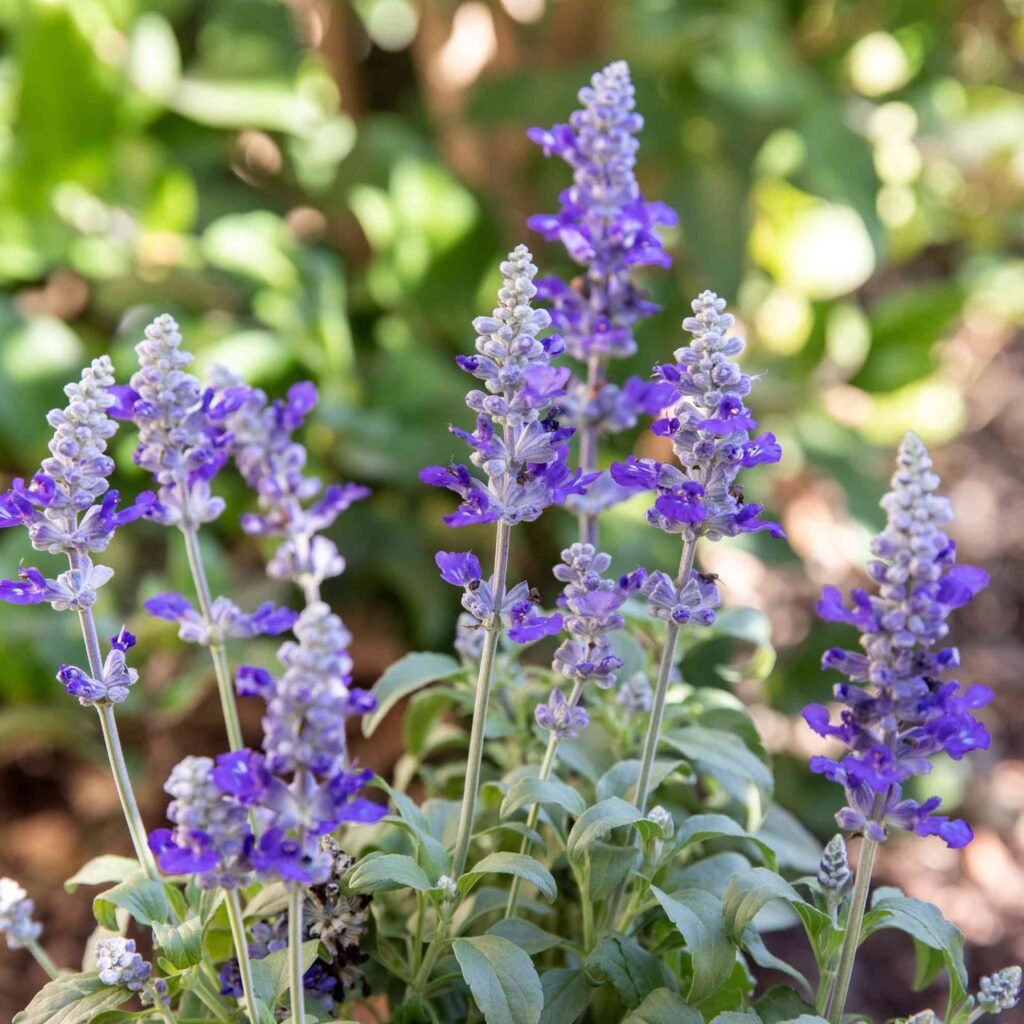
Salvia farinacea, commonly known as mealycup sage or mealy blue sage, is a hardy perennial that dazzles with its long spikes of blue to violet flowers. Its ability to bloom for months makes it a favorite in ornamental displays.

Key Features:

  • Grows 2–3 feet tall, with narrow, lance-shaped leaves.
  • Produces slender spikes of violet-blue flowers.
  • Extremely drought-tolerant once established.

Why It Brightens Gardens:

This salvia’s continuous blooms from late spring until frost provide a consistent splash of color. It looks stunning when planted en masse in flower beds, adding waves of cool blues to balance warmer hues.

Growing Tips:

  • Requires full sun exposure.
  • Thrives in sandy or loamy soils with good drainage.
  • Deadheading extends the flowering season.
  • Hardy in USDA zones 8–10, often grown as an annual in cooler climates.

5. Salvia microphylla (Hot Lips Sage) – A Playful Bi-Color Beauty

For something unique and eye-catching, Salvia microphylla, also known as Hot Lips sage, is an excellent choice. With its red-and-white bicolor flowers, this salvia adds charm and personality to any garden.

Key Features:

  • Grows about 3–4 feet tall and wide.
  • Produces small, bi-colored flowers—red with white tips—that resemble lips.
  • Blooms prolifically from late spring through fall.

Why It Brightens Gardens:

The playful two-tone flowers stand out against green foliage, adding a cheerful, whimsical touch. This variety is also incredibly attractive to hummingbirds and bees, ensuring lively activity in your garden.

Growing Tips:

  • Thrives in full sun and well-drained soil.
  • Tolerates heat and drought exceptionally well.
  • Light pruning after flowering helps maintain shape.
  • Hardy in USDA zones 8–11.

General Care Tips for Salvias

While each salvia variety has specific needs, here are some universal care tips:

  1. Sunlight: Salvias love the sun—most varieties require at least 6 hours of direct sunlight daily.
  2. Soil: Well-drained soil is crucial; salvias dislike waterlogged conditions.
  3. Watering: Water regularly during establishment, then reduce frequency once plants are mature.
  4. Pruning: Deadhead regularly to encourage reblooming and cut back after flowering to maintain shape.
  5. Fertilizer: A light feeding with balanced fertilizer during the growing season boosts growth.
  6. Winter Care: Perennial salvias may need mulching in colder climates for winter protection.

Designing with Salvias in the Garden

Salvias are not only functional but also versatile in design. Here are a few creative ways to use them:

  • Borders and Edging: Use compact salvias like Salvia nemorosa to create neat, colorful edges.
  • Wildlife Gardens: Plant pollinator-friendly varieties like Salvia guaranitica and Hot Lips to attract hummingbirds and butterflies.
  • Mass Planting: Group salvias such as Mealycup Sage for a striking, wave-like display.
  • Mixed Beds: Pair scarlet sage with yellow marigolds, blue salvia, or ornamental grasses for contrast.
  • Containers: Dwarf or compact varieties grow beautifully in pots, brightening up patios or balconies.

Final Thoughts

Salvia plants are a true gift to gardeners—offering vivid colors, aromatic foliage, and pollinator-friendly blooms with minimal maintenance. Whether you’re drawn to the rich purple spikes of Salvia nemorosa, the fiery reds of Salvia splendens, the dramatic blues of Salvia guaranitica and Salvia farinacea, or the playful charm of Salvia microphylla (Hot Lips), there’s a variety that will perfectly match your garden style.

By adding these five stunning salvias, you’ll not only brighten up your outdoor space but also create a lively, vibrant garden filled with color, fragrance, and wildlife. Their adaptability, resilience, and beauty make them a must-have in any gardener’s collection.

5 Climbing Indoor Houseplants That Beautify Your Walls

5 Climbing Indoor Houseplants That Beautify Your Walls

Indoor climbing plants are a timeless way to bring life, greenery, and texture into your home. These beautiful plants naturally trail or climb, making them ideal for walls, trellises, hanging baskets, or even decorative shelves. Not only do they enhance your interiors with their lush foliage, but many climbing plants are also excellent air purifiers, helping you breathe cleaner air indoors.

For beginners and seasoned plant lovers alike, climbing houseplants are versatile, low-maintenance, and rewarding. In this article, we’ll explore five of the best climbing indoor houseplants that can easily beautify your walls, along with detailed tips on how to grow and care for them successfully.


Why Choose Climbing Indoor Plants?

Climbing plants are unique because they don’t just grow upwards; they transform vertical spaces into living art. Here are a few reasons why they’re worth considering:

  • Space-Saving: Ideal for small apartments and homes since they grow vertically rather than spreading wide.
  • Aesthetic Appeal: Their cascading vines and wall-hugging nature add elegance and charm to any space.
  • Air Purification: Many climbing plants filter indoor toxins, improving air quality.
  • Adaptability: They thrive in containers, hanging baskets, or wall-mounted planters.
  • Mood-Boosting: Indoor greenery reduces stress and enhances productivity.

1. Pothos (Epipremnum aureum) – The Classic Wall Climber

If you’re looking for a foolproof indoor climbing plant, pothos is your best choice. Known for its resilience and lush trailing vines, pothos is a household favorite for beginners and experts alike.

Key Features:

  • Heart-shaped leaves with beautiful variegation (green, yellow, or white streaks).
  • Extremely fast-growing, capable of climbing or trailing several feet.
  • Grows well in low to bright indirect light.

Why It Beautifies Walls:

Pothos vines can climb trellises, moss poles, or wall hooks, creating a curtain of greenery. Its variegated foliage stands out against plain walls, making it a decorative masterpiece.

Care Tips:

  • Water when the top inch of soil feels dry.
  • Thrives in average room humidity but grows faster in slightly humid conditions.
  • Propagate easily from cuttings, so you can multiply plants and cover more wall space.

2. Philodendron (Philodendron hederaceum) – Elegant and Adaptable

Philodendrons are another staple among climbing indoor plants. With their trailing or climbing vines and glossy, heart-shaped leaves, they bring elegance and warmth to interiors.

Key Features:

  • Evergreen vines that can grow several feet long.
  • Popular varieties include Heartleaf Philodendron and Philodendron Brasil (variegated).
  • Tolerates low light but thrives in bright, indirect light.

Why It Beautifies Walls:

Philodendrons can be trained to climb wall trellises, moss poles, or even picture frames. Their lush, cascading vines create a tropical jungle-like feel in living rooms and bedrooms.

Care Tips:

  • Water moderately, allowing soil to dry slightly between waterings.
  • Benefits from monthly feeding with a balanced houseplant fertilizer.
  • Regular pruning encourages fuller growth and prevents leggy vines.

3. English Ivy (Hedera helix) – Classic and Air-Purifying

English ivy is a timeless climbing plant admired for its classic, ivy-shaped leaves and vigorous growth. Indoors, it makes a perfect wall plant when given the right structure to climb.

Key Features:

  • Attractive lobed leaves with rich green or variegated patterns.
  • Natural climber that attaches easily to trellises or supports.
  • Known for its ability to purify indoor air.

Why It Beautifies Walls:

English ivy brings a traditional, elegant charm to walls. It’s especially beautiful in vintage-inspired or cottage-style interiors. Its dense growth can cover entire wall sections, creating a dramatic living accent.

Care Tips:

  • Prefers bright, indirect light but tolerates some shade.
  • Keep soil evenly moist but not waterlogged.
  • Regular trimming helps maintain shape and prevents invasive spreading indoors.

4. String of Hearts (Ceropegia woodii) – Delicate and Romantic

For something a little more unique and romantic, the String of Hearts plant is a fantastic choice. This semi-succulent trailing plant features long vines adorned with tiny, heart-shaped leaves.

Key Features:

  • Leaves are green with silvery patterns, often tinged with purple on the underside.
  • Trailing vines can grow up to 10 feet long indoors.
  • Prefers bright, indirect light but tolerates dappled sunlight.

Why It Beautifies Walls:

The String of Hearts brings a whimsical, cascading effect to walls. It’s especially beautiful when grown in hanging planters near walls or draped across shelves, creating a romantic, bohemian vibe.

Care Tips:

  • Allow soil to dry out between waterings (drought-tolerant).
  • Best grown in well-draining, succulent-type soil.
  • Trim vines to encourage bushier growth and propagate easily from cuttings.

5. Monstera Adansonii (Swiss Cheese Vine) – Bold and Tropical

If you want a bold, tropical look, Monstera adansonii is the plant to choose. Also known as the Swiss Cheese Vine, this plant is famous for its unique, holey leaves.

Key Features:

  • Distinctive fenestrated (perforated) leaves.
  • Fast-growing climber when supported with a moss pole or trellis.
  • Thrives in bright, indirect light and moderate humidity.

Why It Beautifies Walls:

The dramatic leaves of Monstera adansonii make it a showstopper on any wall. Its climbing vines can be trained vertically, adding a bold tropical flair to living rooms, hallways, or office spaces.

Care Tips:

  • Keep soil moist but not soggy.
  • Mist leaves occasionally or use a humidifier for best growth.
  • Provide a support structure to encourage climbing and larger leaf development.

General Tips for Growing Climbing Indoor Plants

Regardless of which variety you choose, the following tips will help your climbing plants thrive:

  1. Provide Support: Use wall hooks, trellises, moss poles, or even string to guide the vines.
  2. Light Requirements: Most climbing plants thrive in bright, indirect light. Avoid harsh, direct sunlight.
  3. Soil: Well-draining soil is essential to prevent root rot.
  4. Watering: Water moderately—overwatering is the most common mistake.
  5. Pruning: Regular trimming keeps vines in shape and prevents messy overgrowth.
  6. Fertilizing: Use a balanced liquid fertilizer once a month during the growing season.

Benefits of Climbing Plants for Walls

  • Adds Vertical Greenery: Maximizes small spaces by using walls.
  • Improves Indoor Air Quality: Many climbing plants filter pollutants like formaldehyde and benzene.
  • Decorative Versatility: Works with modern, minimalist, or vintage interiors.
  • Stress Relief: Indoor greenery reduces anxiety and boosts mood.
  • Customizable Growth: Train vines to cover frames, shelves, or create unique wall patterns.

Final Thoughts

Climbing indoor plants are more than just greenery—they are living wall art. From the resilient Pothos and elegant Philodendron, to the classic English Ivy, the delicate String of Hearts, and the bold Monstera adansonii, these five plants are beginner-friendly, visually striking, and easy to grow.

With just a little care—ensuring the right light, soil, and watering habits—you can transform your walls into lush, vertical gardens. Not only will they beautify your home, but they’ll also improve air quality and bring a calming touch of nature indoors.

So if you’re ready to elevate your interiors, start with these five climbing houseplants—your walls will thank you with beauty, charm, and fresh greenery year-round.

How to Plant Bulbs for Stunning Flowers

How to Plant Bulbs for Stunning Flowers

Flowering bulbs are one of the easiest and most rewarding ways to add bursts of color and life to your garden. Whether it’s the cheerful daffodils of spring, the bold tulips, or the fragrant lilies of summer, bulbs can transform your outdoor space into a vibrant paradise. The beauty of bulb gardening lies in the anticipation—you plant them once, and months later, you’re rewarded with stunning blooms. But to achieve this, you must know when, where, and how to plant bulbs properly.

This comprehensive guide walks you through everything you need to know about planting bulbs for a breathtaking display of flowers.


Understanding Flower Bulbs

Before planting, it’s important to understand what a bulb actually is. A bulb is essentially a storage organ for a plant, containing everything it needs to grow and bloom. It stores nutrients and energy that will help the plant survive winter dormancy and emerge strong in spring or summer.

There are two main types of bulbs:

  1. Spring-flowering bulbs – such as tulips, daffodils, hyacinths, and crocuses. These are planted in the fall and bloom in early to late spring.
  2. Summer-flowering bulbs – such as lilies, dahlias, gladiolus, and begonias. These are planted in spring and bloom during summer and early autumn.

Knowing which type you are planting helps you choose the right season and care routine.


Choosing the Right Bulbs

The quality of your flowers starts with the quality of your bulbs. Always purchase bulbs from trusted nurseries or garden centers. Look for bulbs that are firm, plump, and free of mold, cuts, or soft spots. Large bulbs generally produce larger, healthier blooms.

Consider climate conditions as well. For example:

  • Tulips and daffodils thrive in colder regions where winters are frosty.
  • Lilies and gladiolus do better in warm, temperate climates.

If you live in an area with mild winters, you may need to pre-chill bulbs like tulips and hyacinths in the refrigerator for about 6–8 weeks before planting, to mimic winter dormancy.


Best Time to Plant Bulbs

Timing is everything when it comes to planting bulbs.

  • Spring-flowering bulbs (tulips, daffodils, crocuses, hyacinths): Plant in autumn, about 6–8 weeks before the first frost. This gives the bulbs time to develop roots before winter sets in.
  • Summer-flowering bulbs (lilies, dahlias, gladiolus): Plant in spring, after the last frost date, when the soil has warmed up to around 13–16°C (55–60°F).

Planting at the right time ensures bulbs settle in the soil, store energy, and bloom at the proper season.


Preparing the Soil

Bulbs need well-drained soil to thrive. If water collects around the bulbs, they will rot. Follow these steps to prepare the perfect soil bed:

  1. Choose the right location: Most bulbs need full sun (6–8 hours daily). However, some like snowdrops and bluebells can tolerate partial shade.
  2. Check soil drainage: Dig a test hole, fill it with water, and observe how quickly it drains. If water stagnates for hours, amend the soil with sand, compost, or peat moss.
  3. Enrich the soil: Mix in organic matter like compost or well-rotted manure to improve fertility. A balanced slow-release fertilizer also helps bulbs establish strong roots.

Step-by-Step Guide to Planting Bulbs

Here’s a foolproof method for planting bulbs that will give you the best results:

1. Dig the Right Depth

  • A general rule is to plant bulbs at a depth two to three times the bulb’s height.
  • For example: If a bulb is 2 inches tall, plant it 4–6 inches deep.
  • Larger bulbs like daffodils need deeper planting (6–8 inches), while smaller ones like crocuses can be planted 2–3 inches deep.

2. Position the Bulb Correctly

  • Place the bulb pointed side up (this is where the stem grows).
  • If you’re unsure which end is up, plant it sideways—it will find its way to the surface.

3. Space Them Properly

  • Allow space between bulbs so they don’t compete for nutrients.
  • Small bulbs: 2–3 inches apart.
  • Large bulbs: 4–6 inches apart.

4. Cover and Water

  • Gently cover the bulbs with soil and pat down to remove air pockets.
  • Water thoroughly after planting to help the soil settle and encourage root growth.

Caring for Bulbs After Planting

Bulbs don’t need much attention once planted, but a few simple practices will ensure they thrive:

  1. Mulching: Apply a 2–3 inch layer of mulch to protect bulbs from temperature fluctuations, conserve moisture, and reduce weeds.
  2. Watering: Water well after planting, but avoid overwatering. During dormancy, most bulbs don’t need much water.
  3. Fertilizing: Feed bulbs with a low-nitrogen fertilizer (such as a 5-10-10 formula) in early spring when shoots emerge. Avoid too much nitrogen, which promotes leaves but weak flowers.
  4. Deadheading: Remove spent flowers so the plant directs energy to the bulb for next year’s growth instead of seed production.

Common Mistakes to Avoid

  • Planting too shallow: This makes bulbs vulnerable to frost, animals, or drying out.
  • Waterlogged soil: Poor drainage is the main cause of bulb rot.
  • Overcrowding: Too many bulbs too close together lead to weak growth.
  • Removing foliage too soon: Always let leaves die back naturally—they feed the bulb for next year’s bloom.

Extending the Blooming Season

To keep your garden colorful for longer, plant a mix of early, mid, and late-flowering bulbs. For example:

  • Early spring: Crocuses and snowdrops.
  • Mid-spring: Tulips and daffodils.
  • Late spring: Alliums and irises.
  • Summer: Lilies, gladiolus, and dahlias.

This succession planting creates continuous waves of color from spring through summer.


Storing Bulbs After Bloom

Some bulbs (like daffodils) can stay in the ground year after year, multiplying naturally. Others (like gladiolus and dahlias) may need to be dug up and stored for winter in colder climates.

To store bulbs:

  1. Gently dig them up after the foliage has yellowed.
  2. Brush off excess soil and let them dry in a cool, airy place.
  3. Store in paper bags or mesh sacks in a cool, dry location until the next planting season.

Conclusion

Planting bulbs is a simple, rewarding way to add stunning flowers to your garden. With just a little preparation, you can enjoy dazzling displays of tulips, daffodils, lilies, or gladiolus year after year. By choosing the right bulbs, planting at the right time, preparing the soil properly, and providing basic care, you’ll ensure your bulbs thrive and give you vibrant blooms season after season.

Whether you’re a beginner gardener or an experienced green thumb, bulbs are a must-have for creating an effortlessly beautiful and colorful garden. Start planting today, and get ready for a breathtaking floral show that will brighten your landscape for months to come!

How to Care for a Money Plant and Keep It Thriving

How to Care for a Money Plant and Keep It Thriving

A Money Plant (Epipremnum aureum), also popularly known as Pothos or Devil’s Ivy, is one of the most cherished houseplants across the world. Not only is it believed to bring prosperity, positivity, and good luck, but it also enhances the beauty of homes with its lush green trailing vines. This low-maintenance plant is perfect for beginners and experienced gardeners alike, making it a must-have in both traditional and modern households.

In this complete guide, we’ll walk you through everything you need to know about caring for a money plant and keeping it thriving year-round—from choosing the right spot, watering effectively, and fertilizing wisely, to pruning and propagating it for more growth.


Why Choose a Money Plant?

Money plants are more than just attractive greenery. They come with a set of unique benefits:

  • Air Purification: NASA’s Clean Air Study revealed that money plants help filter harmful toxins like formaldehyde and benzene from indoor air.
  • Symbolism: In Feng Shui and Vastu Shastra, money plants are considered auspicious, attracting wealth, peace, and harmony.
  • Adaptability: They thrive in both soil and water, indoors or outdoors, and in hanging pots, bottles, or garden beds.
  • Low Maintenance: Unlike many houseplants, money plants are extremely forgiving and easy to care for.

Choosing the Right Growing Medium

Money plants can grow in two popular ways:

  1. In Soil
    • Growing in soil provides stronger root development.
    • Use a well-draining potting mix with a blend of garden soil, cocopeat, and compost.
    • Ideal for long-term growth and bigger, lusher plants.
  2. In Water
    • A stylish option for modern homes.
    • Use a glass jar or bottle filled with clean, filtered water.
    • Change the water every 7–10 days to avoid stagnation.
    • Roots grow slower but the plant looks elegant indoors.

Tip: You can start a cutting in water and later transfer it to soil for stronger growth.


Light Requirements

  • Money plants thrive in indirect sunlight. Too much direct sunlight can scorch the leaves, while too little light slows growth.
  • Place them near east- or north-facing windows where they receive bright, filtered light.
  • If grown indoors with limited light, they still survive, but growth will be slower.

Avoid: Exposing the plant to harsh midday sun, especially if grown outdoors.


Watering the Money Plant

Watering is the most crucial aspect of caring for a money plant. Both overwatering and underwatering can harm the plant.

  • In Soil:
    • Water only when the top 1–2 inches of soil feels dry.
    • In summer, watering once or twice a week is ideal.
    • In winter, reduce watering to prevent root rot.
  • In Water:
    • Ensure the roots are submerged but leaves remain above water.
    • Change the water regularly and keep the container clean.

Pro Tip: Always use room-temperature water and avoid chlorinated tap water whenever possible.


Temperature and Humidity Needs

Money plants thrive in warm, humid environments:

  • Ideal Temperature: 18°C – 30°C (65°F – 85°F).
  • Avoid: Extremely cold drafts or frost, which can damage the plant.
  • Humidity: Average room humidity is fine, but in very dry climates, mist the leaves occasionally to keep them healthy and green.

Fertilizing for Healthy Growth

Money plants don’t need heavy feeding but benefit from a boost of nutrients.

  • Use a balanced liquid fertilizer (NPK 10:10:10) once a month during the growing season (spring and summer).
  • Avoid over-fertilizing, which can lead to yellowing leaves or burnt roots.
  • For plants growing in water, add a liquid hydroponic nutrient or replace the water with nutrient-rich liquid once a month.

Organic options like banana peel fertilizer, compost tea, or diluted cow dung solution can also work well.


Pruning and Training

Pruning not only makes your money plant look attractive but also keeps it healthy:

  • Trim long, leggy stems to encourage bushier growth.
  • Remove yellow or damaged leaves promptly.
  • Money plants can be trained to climb walls, trellises, or moss sticks, creating a stunning green display indoors.

Repotting the Money Plant

As the plant grows, it may outgrow its container. Repotting ensures healthy growth:

  • Repot every 2–3 years, or when roots start peeking out from the drainage holes.
  • Choose a pot 2–3 inches larger in diameter than the old one.
  • Refresh the soil with nutrient-rich compost during repotting.

Propagating Money Plants

One of the most rewarding parts of having a money plant is how easy it is to propagate.

Steps for Propagation:

  1. Take a healthy cutting with at least 4–6 inches in length.
  2. Ensure the cutting has one or two nodes (the small bumps where leaves or roots emerge).
  3. Place the node in water or moist soil.
  4. Roots will start developing within 1–2 weeks.

This makes money plants perfect for sharing with friends and family as gifts of prosperity.


Common Problems and Solutions

Even though money plants are hardy, they may face some common issues:

  1. Yellowing Leaves
    • Cause: Overwatering or poor drainage.
    • Solution: Reduce watering, improve soil drainage.
  2. Brown Tips on Leaves
    • Cause: Low humidity or excess fertilizer.
    • Solution: Mist leaves, cut back on fertilizer.
  3. Slow Growth
    • Cause: Low light or lack of nutrients.
    • Solution: Move to a brighter spot and feed monthly.
  4. Pests (like mealybugs or spider mites)
    • Solution: Wipe leaves with neem oil spray or mild soapy water.

Feng Shui and Vastu Placement Tips

The placement of a money plant is considered very important for attracting positive energy:

  • Best Direction: Southeast corner of the house, as per Vastu Shastra, to invite prosperity.
  • Avoid placing it in the north-east direction, as it may lead to financial stress.
  • For office spaces, placing a money plant near the desk can promote productivity and positivity.

Final Thoughts

Caring for a money plant is easy, rewarding, and deeply symbolic. With just a little attention to light, water, and pruning, this plant can flourish and bring both aesthetic beauty and good vibes to your space. Its adaptability in soil or water, ease of propagation, and air-purifying qualities make it one of the best houseplants you can grow.

Whether you’re a gardening enthusiast or simply looking for a low-maintenance plant that enhances your home, the money plant is the perfect choice. With the tips in this guide, you can ensure your money plant thrives, spreads positivity, and perhaps even brings a touch of prosperity to your life.

How to Plant Pumpkin Seeds for a Fun Fall Harvest

How to Plant Pumpkin Seeds for a Fun Fall Harvest

Few gardening experiences are as rewarding as growing your own pumpkins. These bright orange beauties are not only perfect for fall decorations and Halloween jack-o’-lanterns but also make for delicious pies, soups, and roasted seeds. Planting pumpkin seeds is a fun and beginner-friendly project, but it does require some planning and care to ensure a bountiful harvest. With the right timing, soil preparation, and maintenance, you can enjoy a thriving pumpkin patch that will be the highlight of your garden by autumn.

In this guide, we’ll walk you through everything you need to know about how to plant pumpkin seeds, from choosing the right variety to harvesting your pumpkins at the perfect time.


1. Choosing the Right Pumpkin Variety

Before planting, decide what type of pumpkins you want to grow. Pumpkins come in many varieties, each suited to different purposes:

  • Jack-o’-Lantern Pumpkins: Medium to large in size, perfect for carving. Popular varieties include Howden and Connecticut Field.
  • Mini Pumpkins: Small, decorative types like Jack Be Little or Baby Boo. Great for table displays and children’s gardens.
  • Pie Pumpkins: Sweeter, smaller pumpkins used for cooking, such as Sugar Pie or Cinderella.
  • Giant Pumpkins: Massive varieties like Atlantic Giant, grown for competitions and impressive displays.

Pick a variety based on your garden space and intended use. Smaller varieties are great for compact gardens, while larger ones need more room to sprawl.


2. When to Plant Pumpkin Seeds

Timing is critical when planting pumpkins because they need warm soil and a long growing season.

  • Soil Temperature: Pumpkins thrive when the soil temperature is at least 70°F (21°C).
  • Frost-Free Days: Pumpkins need 90–120 frost-free days to mature, depending on the variety.
  • Best Planting Time: In most regions, this means planting seeds late spring to early summer (May–June) so the pumpkins are ready for harvest in September–October.

If your growing season is shorter, consider starting seeds indoors 2–3 weeks before transplanting them outside.


3. Preparing the Soil

Pumpkins are heavy feeders, so preparing nutrient-rich soil is essential.

  • Choose a Sunny Spot: Pumpkins need 6–8 hours of direct sunlight daily.
  • Soil Type: They prefer well-drained, loamy soil with a pH between 6.0 and 6.8.
  • Add Organic Matter: Mix in plenty of compost or well-rotted manure before planting to boost fertility.
  • Mound Planting: Pumpkins are usually planted in small mounds or “hills,” which help warm the soil and improve drainage. Each mound should be about 18–24 inches wide and 6–8 inches high.

4. Planting Pumpkin Seeds

Now comes the exciting part—planting the seeds!

  • Spacing: Space pumpkin hills 4–6 feet apart for small varieties and up to 8–12 feet apart for large ones. Pumpkins need room to spread their sprawling vines.
  • Planting Depth: Sow 2–3 seeds per hill, about 1 inch deep.
  • Thinning: Once seedlings sprout and grow their first true leaves, thin them to the strongest plant in each mound.

Pumpkin seeds typically germinate within 7–10 days, provided the soil is warm and moist.


5. Watering and Feeding Your Pumpkins

Pumpkins need consistent moisture to thrive, especially as they develop large fruits.

  • Watering: Provide about 1–2 inches of water per week. Water deeply at the base of the plant rather than overhead to prevent fungal diseases.
  • Mulching: Add a layer of mulch around the base to retain soil moisture and suppress weeds.
  • Fertilizing:
    • Start with a nitrogen-rich fertilizer when plants are young to encourage leafy growth.
    • Switch to a phosphorus- and potassium-rich fertilizer once flowers appear to promote fruiting.

6. Supporting Growth and Pollination

Pumpkins rely on pollination to set fruit, and you can help this process along.

  • Encourage Pollinators: Bees are the main pollinators, so avoid using pesticides during blooming. Plant nearby flowers to attract them.
  • Hand Pollination: If you notice poor pollination, you can hand-pollinate. Use a small brush or cotton swab to transfer pollen from male flowers (with thin stems) to female flowers (with a tiny baby pumpkin at the base).
  • Vine Management: Direct vines as they grow to keep them from taking over your garden. You can gently lift and reposition vines, but avoid breaking them.

7. Protecting Pumpkins from Pests and Diseases

Pumpkins are prone to some common pests and plant diseases.

  • Pests:
    • Squash bugs: Cause yellowing leaves and damage vines.
    • Cucumber beetles: Chew leaves and transmit bacterial wilt.
    • Aphids: Suck sap from leaves, causing curling.

Use floating row covers early in the season or organic insecticides if infestations occur.

  • Diseases:
    • Powdery mildew: White powdery spots on leaves. Improve air circulation and use fungicides if needed.
    • Downy mildew: Yellow or brown patches. Prevent with good spacing and watering practices.

Healthy, well-fed plants are more resistant to pests and disease.


8. Caring for Developing Pumpkins

Once pumpkins begin forming, a little extra care helps them grow beautifully.

  • Support Pumpkins: Place pumpkins on a piece of cardboard, straw, or wood to keep them off damp soil and prevent rot.
  • Limit Fruits: For larger pumpkins, pinch off excess fruit and leave only 1–2 per plant so the plant’s energy goes into fewer, bigger pumpkins.
  • Prune Vines: Cut back overly long vines once fruits have set to direct energy toward ripening.

9. Harvesting Pumpkins

The best part of pumpkin growing is harvest time!

  • When to Harvest: Pumpkins are ready when they are fully colored (orange, white, or their variety color) and the skin is hard. This usually happens in September–October.
  • Stem Check: The stem should be hard and starting to dry.
  • Harvesting Method: Cut pumpkins from the vine with pruning shears, leaving a 3–4 inch stem attached. Never pull them off by hand.
  • Curing: Let pumpkins sit in the sun for about 7–10 days to harden their skins and extend storage life.

10. Storing and Using Pumpkins

Pumpkins can be enjoyed long after harvest if stored correctly.

  • Storage Conditions: Keep pumpkins in a cool, dry place (50–55°F) with good ventilation. They can last several months under proper conditions.
  • Uses:
    • Decorative: Carve jack-o’-lanterns, paint them, or use them in fall displays.
    • Culinary: Roast seeds, bake pies, make soups, or puree for desserts.
    • Composting: Any leftover pumpkins after the season can be composted to enrich your soil for next year.

Final Thoughts

Growing pumpkins from seeds is a joyful gardening experience that brings a true sense of accomplishment. From planting in spring to harvesting in fall, each stage offers excitement and learning. By choosing the right variety, preparing the soil properly, and giving consistent care, you’ll be rewarded with plump, healthy pumpkins ready for Halloween fun or tasty autumn dishes.

Whether you’re starting a small backyard patch or dreaming of a large pumpkin garden, planting pumpkin seeds is the perfect way to celebrate the seasons and connect with nature.

How to Care for Orchids and Keep Them Blooming

How to Care for Orchids and Keep Them Blooming

Orchids are among the most elegant and captivating flowers in the plant kingdom. Known for their striking blooms, exotic beauty, and long-lasting flowers, orchids have been cherished worldwide for centuries. Many people assume that orchids are difficult to care for, but the truth is that with the right knowledge and consistent care, these tropical beauties can thrive and reward you with continuous blooms year after year.

This article will guide you through everything you need to know about orchid care—watering, lighting, humidity, repotting, fertilizing, and even encouraging reblooming—so you can enjoy healthy plants and stunning flowers in your home or garden.


Understanding Orchids: Types and Basics

Before diving into care tips, it’s important to understand the type of orchid you have. Orchids belong to the family Orchidaceae, one of the largest plant families in the world, with over 25,000 species and hybrids. While each orchid type has its own specific needs, some of the most common orchids grown at home include:

  1. Phalaenopsis (Moth Orchid) – Popular and beginner-friendly; produces long-lasting blooms.
  2. Dendrobium – Known for tall canes and clusters of flowers.
  3. Cattleya – Famous for their large, fragrant blossoms.
  4. Oncidium (Dancing Lady Orchid) – Small, charming flowers resembling dancers.
  5. Vanda – Exotic orchids requiring bright light and high humidity.

Though care requirements vary slightly, the core principles of orchid care remain similar.


Light: The Key to Orchid Health

Light is one of the most crucial factors in orchid care. Too much sunlight can scorch the leaves, while too little can prevent blooms.

  • Phalaenopsis and Paphiopedilum prefer medium to low light, making them perfect for indoor windowsills with filtered light.
  • Cattleya, Dendrobium, and Oncidium enjoy bright, indirect light. An east or south-facing window is usually ideal.
  • Vanda orchids thrive in very bright light, often grown outdoors in tropical regions.

Pro Tip: A healthy orchid leaf should be bright green. Dark green leaves usually mean insufficient light, while yellowing or reddish leaves indicate too much sunlight.


Watering Orchids Correctly

Watering mistakes are one of the most common reasons orchids fail. Unlike regular houseplants, orchids often grow on trees in nature, where their roots absorb water quickly but also dry out fast.

  • General Rule: Water once a week during active growth, and every 10–14 days during dormancy.
  • Always allow the roots to dry slightly between watering.
  • Use room-temperature water and avoid letting water sit in the crown of the plant, as it may cause rot.
  • Orchids prefer rainwater or distilled water over hard tap water.

Tip: Check the roots—healthy roots are plump and green when moist, silver-gray when dry. This is the best indicator of when to water.


Humidity and Airflow: Creating a Tropical Environment

Since orchids are tropical plants, they thrive in environments with humidity levels between 40–70%. Dry air, especially indoors during winter, can hinder their growth.

  • Place orchids on a humidity tray (a shallow dish with water and pebbles).
  • Group plants together to naturally increase humidity.
  • Mist the leaves occasionally, but avoid soaking the flowers.
  • Ensure good airflow to prevent fungal diseases. A small fan in the room can help.

Temperature: Keeping Orchids Comfortable

Most orchids prefer daytime temperatures between 65–75°F (18–24°C) and slightly cooler nights around 55–65°F (13–18°C). The difference between day and night temperature is important, as it often triggers flowering.

  • Avoid placing orchids near heating vents, cold drafts, or air conditioners.
  • A consistent environment mimicking their natural tropical habitat works best.

Fertilizing Orchids for Strong Blooms

Orchids are not heavy feeders, but they do need nutrients to thrive and bloom.

  • Use a balanced orchid fertilizer (20-20-20) once a week in diluted form (“weakly, weekly” rule).
  • During active growth (spring and summer), fertilize every week.
  • In fall and winter, reduce to once or twice a month.
  • Flush the potting medium with plain water monthly to prevent salt buildup.

Repotting Orchids: Refreshing Their Home

Orchids should be repotted every 1–2 years to prevent root rot and refresh their growing medium. Signs your orchid needs repotting include:

  • Roots growing out of the pot.
  • The potting medium breaking down into fine soil.
  • Water not draining well.

Steps for Repotting:

  1. Choose a pot with good drainage holes.
  2. Use orchid-specific potting mix (usually bark, sphagnum moss, or a blend).
  3. Gently remove the orchid, trim dead roots, and place it in fresh medium.
  4. Avoid watering for a few days to allow cut roots to heal.

How to Keep Orchids Blooming

Getting orchids to bloom again is often the biggest challenge for beginners. Here’s how to encourage reblooming:

  1. Provide Proper Light: Ensure the plant receives enough indirect sunlight.
  2. Control Temperature: A drop in nighttime temperature helps trigger flower spikes.
  3. Don’t Over-Fertilize: Too much nitrogen promotes leaves over flowers.
  4. Pruning After Blooms: For Phalaenopsis, cut the flower spike just above the second node (small bump) to encourage side shoots.

Patience is key—some orchids may take months to rebloom, but with the right care, they’ll reward you beautifully.


Common Orchid Problems and Solutions

Even with the best care, orchids sometimes face challenges. Here are common problems and how to fix them:

  • Yellowing Leaves – Often caused by too much light or overwatering. Adjust care accordingly.
  • Root Rot – Due to poor drainage or excess water. Repot with fresh medium and trim affected roots.
  • No Blooms – Usually from insufficient light or nutrients. Relocate to a brighter spot and fertilize properly.
  • Pests (aphids, scale, mealybugs) – Wipe leaves with insecticidal soap or neem oil.

Seasonal Orchid Care

Caring for orchids year-round ensures they continue to thrive:

  • Spring & Summer: Orchids are in active growth. Increase watering, provide fertilizer weekly, and give bright indirect light.
  • Fall: Begin reducing watering and fertilizer. Cooler nights help initiate flower spikes.
  • Winter: Orchids may rest. Reduce watering, maintain humidity, and place them in the brightest indoor location.

Why Orchids Are Worth the Effort

Despite the reputation for being “finicky,” orchids are actually resilient plants when cared for correctly. Their beauty, exotic blooms, and ability to rebloom make them rewarding companions for both beginner and experienced gardeners. With proper attention to light, water, humidity, and nutrition, your orchids will not only survive but thrive, producing spectacular flowers for months at a time.


Conclusion

Orchids are living works of art, and learning how to care for them properly is the key to enjoying their beauty year after year. By understanding their unique needs—light, watering, humidity, fertilizing, and repotting—you’ll be able to grow orchids that bloom reliably and bring elegance to your home. With patience and practice, you’ll discover that orchids aren’t difficult at all—they just need a bit of extra love and attention.

So, start today! Follow these tips, create a nurturing environment, and soon you’ll be enjoying a collection of orchids that bloom endlessly, adding charm and serenity to your living space.

How to Plant and Grow Orchid Plants at Home

How to Plant and Grow Orchid Plants at Home

Orchids are some of the most stunning and exotic plants that bring elegance and beauty into any home. Known for their intricate blooms, vibrant colors, and long-lasting flowers, orchids have fascinated gardeners for centuries. While many people believe orchids are difficult to grow, the truth is that with the right care, these plants can thrive indoors and reward you with repeated blooms year after year.

In this complete guide, we’ll explore how to plant and grow orchids at home, including choosing the right variety, proper planting techniques, and effective care tips to keep your orchids healthy and flourishing.


Introduction to Orchids

Orchids belong to the family Orchidaceae, one of the largest plant families in the world, with over 25,000 species and more than 100,000 hybrids. They are found on every continent except Antarctica and thrive in diverse climates, from tropical rainforests to semi-arid regions.

The most popular orchids for home growing include:

  • Phalaenopsis (Moth Orchid): Easy to grow, with long-lasting blooms.
  • Dendrobium: Produces clusters of flowers and adapts well to indoor conditions.
  • Cattleya: Known for large, fragrant flowers.
  • Oncidium (Dancing Lady): Distinguished by bright, cheerful blooms.
  • Vanda: Colorful and often grown in hanging baskets.

Each type has slightly different care requirements, but the basics remain the same.


Step 1: Choosing the Right Orchid for Home Growing

If you’re a beginner, Phalaenopsis orchids are the best choice. They are hardy, forgiving, and bloom for several months at a time. Consider your indoor environment—light availability, humidity, and temperature—before choosing an orchid variety.

  • Low to medium light homes: Phalaenopsis and Paphiopedilum orchids.
  • Bright, indirect light spaces: Dendrobium, Cattleya, and Oncidium orchids.
  • High humidity, warm areas: Vanda orchids.

Step 2: Selecting the Right Pot and Growing Medium

Unlike many plants, orchids do not grow well in regular soil. They are epiphytes in their natural environment, meaning they grow on trees and absorb nutrients from air, rain, and decaying matter.

Pot Choice:

  • Use transparent plastic pots with drainage holes—this allows light to reach the roots and helps monitor root health.
  • Decorative ceramic or clay pots can also be used but ensure they have proper drainage.

Growing Medium Options:

  • Orchid bark mix (fir bark or pine bark) – great drainage.
  • Sphagnum moss – retains moisture for orchids needing more humidity.
  • Perlite or charcoal – added for aeration.
  • A combination of bark, moss, and perlite works best for most orchids.

Step 3: Planting Orchids at Home

Here’s a step-by-step guide to planting orchids:

  1. Prepare the pot – Place a layer of coarse bark or pebbles at the bottom for drainage.
  2. Position the orchid – Gently place the orchid in the pot, spreading out the roots.
  3. Add growing medium – Fill the pot with the orchid mix, ensuring the crown (base of leaves) is above the medium.
  4. Secure the plant – Press the medium gently to stabilize the orchid without compacting it.
  5. Water lightly – Give a gentle watering after planting, but do not soak.

Step 4: Providing the Right Light Conditions

Light is the most important factor for orchid growth. Too much light burns leaves, while too little prevents blooming.

  • Ideal light: Bright, indirect light near east- or south-facing windows.
  • Leaf color as an indicator:
    • Healthy light – medium green leaves.
    • Too much light – yellowish leaves.
    • Too little light – dark green leaves with no flowers.
  • Use sheer curtains to filter sunlight if necessary.

For homes with limited natural light, LED grow lights are a great solution.


Step 5: Watering Orchids Correctly

Watering orchids can be tricky, as they dislike sitting in water.

  • Frequency: Water once a week in summer, once every two weeks in winter.
  • Method: Soak the potting medium thoroughly, then allow excess water to drain out.
  • Avoid: Letting water sit at the crown, as this causes root rot.

A simple rule is: “When in doubt, wait to water.” Orchids prefer slightly dry roots to overwatering.


Step 6: Humidity and Temperature Needs

Orchids thrive in 40–70% humidity and warm conditions.

  • Temperature range:
    • Day: 70–85°F (21–29°C)
    • Night: 60–70°F (16–21°C)
  • Humidity tips:
    • Place a humidity tray (a shallow tray filled with pebbles and water) under the pot.
    • Mist the plant lightly in the morning during dry weather.
    • Use a humidifier for consistent levels indoors.

Step 7: Fertilizing Orchids

Orchids are light feeders but need regular nutrition.

  • Use a balanced orchid fertilizer (20-20-20) every two weeks during the growing season.
  • Dilute fertilizer to half strength to avoid root burn.
  • Switch to a bloom-boosting fertilizer high in phosphorus before flowering.
  • Reduce feeding during dormancy after blooming.

Step 8: Orchid Blooming and Reblooming

Orchid flowers can last for several weeks to months. After flowering, many people think their orchid has died—but it’s simply resting.

  • After blooms fade: Cut the spike above the second node to encourage reblooming.
  • Resting phase: Orchids may appear dormant for a few months—continue light watering and feeding.
  • Reblooming trigger: A slight drop in nighttime temperatures helps induce blooms.

Step 9: Repotting Orchids

Repot orchids every 1–2 years to refresh the medium and prevent root rot.

  • Best time: After flowering, during active growth.
  • Signs it’s time to repot:
    • Medium has broken down.
    • Roots spilling out of the pot.
    • Plant looks overcrowded.

Step 10: Common Orchid Problems and Solutions

  1. Yellow leaves – Overwatering or too much light.
  2. Wrinkled leaves – Underwatering or root damage.
  3. No blooms – Insufficient light or nutrients.
  4. Root rot – Poor drainage; trim damaged roots and repot.
  5. Pests (mealybugs, aphids, spider mites): Wipe with a damp cloth or use insecticidal soap.

Benefits of Growing Orchids at Home

  • Aesthetic appeal: Orchids add elegance and luxury to any room.
  • Air purification: Like many houseplants, orchids improve air quality.
  • Mood booster: Their long-lasting blooms create a calming and uplifting environment.
  • Rewarding hobby: Growing orchids enhances patience and gardening skills.

Final Thoughts

Growing orchids at home may seem intimidating at first, but with proper care, these stunning plants are surprisingly easy to maintain. From choosing the right orchid variety to providing balanced light, humidity, and fertilization, each step ensures your orchids thrive and bloom beautifully.

Whether you’re a beginner or an experienced gardener, orchids can become a centerpiece of your home garden, rewarding you with exotic flowers year after year. Start with a beginner-friendly variety like Phalaenopsis, and soon you’ll be enjoying the elegance and charm of your very own orchid collection.

5 Eye-Catching Balcony Flower Bed Ideas for Small Spaces

5 Eye-Catching Balcony Flower Bed Ideas for Small Spaces

When living in an apartment or urban setting, having a balcony can be a wonderful opportunity to enjoy greenery in limited space. Flower beds on balconies not only enhance the look of your home but also create a calming atmosphere filled with color and fragrance. With smart planning and creative designs, even the smallest balcony can be transformed into a lush floral retreat. Below are five eye-catching balcony flower bed ideas that perfectly combine style and function for small spaces.


1. Vertical Hanging Flower Beds

Vertical hanging flower beds are a fantastic solution for balconies where floor space is limited. By using wall-mounted planters, hanging pots, or a vertical trellis system, you can maximize your balcony’s height instead of crowding the floor. Flowers like petunias, trailing lobelia, and fuchsias thrive in hanging arrangements, cascading down beautifully to add depth and vibrancy. These designs also allow for creative layering of colors and textures, turning your balcony into a floral wall of art that never fails to impress.


2. Tiered Wooden Box Flower Beds

Tiered wooden flower boxes are perfect for adding structure and style to small balconies. These beds use vertical levels to create space for multiple flowers while maintaining a neat and organized appearance. Plants like marigolds, pansies, and small daisies look charming when arranged on different tiers, creating a vibrant color cascade. The rustic wooden boxes also bring natural warmth to the setting, making your balcony feel cozy and inviting. This design maximizes plant variety without overwhelming the limited space.


3. Rail-Mounted Flower Beds

Rail-mounted flower beds are an elegant and practical idea for balconies, especially when you don’t want to use up the floor area. Special planter boxes can be securely attached to balcony railings, providing an elevated platform for your blooms. Bright flowers such as geraniums, petunias, and begonias thrive in these setups, creating a colorful frame around your balcony. Not only do these flower beds save space, but they also offer a beautiful outward-facing display that enhances your home’s curb appeal from the street below.


4. Compact Corner Flower Beds

Corners are often underutilized spaces on a balcony, making compact corner flower beds an excellent design choice. By adding triangular or rounded planters, you can fill these empty areas with blossoms like lavender, snapdragons, or dwarf roses. These flower beds instantly brighten the balcony while keeping the central area free for seating or other decor. Pairing the blooms with decorative stones or a mini lantern enhances the look, making the corner a delightful focal point of your small outdoor retreat.


5. Multi-Purpose Bench Flower Beds

For a creative and functional approach, multi-purpose bench flower beds combine seating with built-in planters. These designs are especially eye-catching for balconies as they save space while providing both comfort and greenery. Imagine sitting on a wooden bench surrounded by vibrant flowers like zinnias, pansies, and chrysanthemums that add charm to your seating nook. This setup transforms the balcony into a cozy floral lounge, perfect for morning coffee or evening relaxation, while making the best use of limited space.


Conclusion:
Small balconies don’t have to feel restrictive—creative flower bed designs can bring beauty, freshness, and personality to your limited outdoor area. Whether you prefer vertical gardens, rail planters, or multifunctional benches, each of these ideas can transform your balcony into a floral sanctuary that elevates your daily living experience.

5 Stunning Star-Shaped Flower Beds for Standout Garden Style

5 Stunning Star-Shaped Flower Beds for Standout Garden Style

A garden is often seen as an expression of creativity, and nothing highlights originality more than unique shapes that immediately capture attention. Star-shaped flower beds are a wonderful way to transform an ordinary outdoor space into a dazzling centerpiece. These designs bring both structure and charm, creating a sense of symmetry while offering endless planting possibilities. Below are five stunning star-shaped flower bed ideas that will help you achieve a standout garden style full of elegance and character.


1. Classic Five-Point Star Flower Bed

The timeless five-point star design is perfect for creating a striking focal point in your garden. Each section of the star can be filled with different flower varieties, such as roses, tulips, or daisies, to bring vibrant color contrasts. Low-growing plants along the edges can emphasize the sharp star outline, while taller plants in the center add depth. This design works beautifully in front yards, where symmetry and bold geometry make a lasting first impression.


2. Layered Star Flower Bed with Multiple Levels

Adding layers to your star-shaped flower bed creates a dramatic effect, especially in spacious gardens. By elevating the central section with stones or bricks and planting cascading flowers on the outer points, the design gains dimension and a three-dimensional starburst look. Plants like petunias, lavender, or creeping thyme enhance the visual flow as they spill over the edges. This layered arrangement looks particularly enchanting when combined with night lighting to highlight its geometric beauty.


3. Herbal Star Flower Bed for Function and Style

A star-shaped flower bed doesn’t have to be purely ornamental—it can also serve a practical purpose. Transforming the star into a herbal garden with fragrant plants like rosemary, basil, mint, and thyme adds both beauty and utility. The geometric design makes it easy to separate different herbs while maintaining a cohesive star form. This type of flower bed not only looks stunning but also provides fresh herbs for cooking, making it a stylish and functional garden addition.


4. Star-Shaped Wildflower Bed for Natural Charm

For a softer, more rustic aesthetic, filling your star-shaped bed with wildflowers is a wonderful idea. Daisies, coneflowers, poppies, and other colorful blooms bring a meadow-inspired look while maintaining the structure of the star. Unlike more formal designs, the wildflower star embraces a slightly untamed feel, making it ideal for cottage gardens or backyard retreats. Its charming blend of order and natural beauty ensures that your garden feels vibrant and welcoming.


5. Starburst Bed with Radiating Color Themes

A creative twist on the star shape is to plant flowers in radiating color patterns that mimic a starburst effect. For example, you can use bright yellows in the center, transitioning to oranges, reds, and purples as the points extend outward. This design creates a visual explosion of color that’s sure to impress. Pairing this with plants that bloom across different seasons ensures your starburst flower bed remains eye-catching year-round.


Final Thoughts
Star-shaped flower beds are a unique way to blend structure, creativity, and natural beauty into your garden. Whether you prefer a neat and symmetrical look, a layered starburst, or a rustic wildflower star, these designs guarantee a standout style. With careful planning, lighting, and plant selection, your garden will shine like a star—literally—capturing attention and admiration from anyone who visits.

5 Unique Gothic-Inspired Flower Bed Ideas for Dramatic Gardens

5 Unique Gothic-Inspired Flower Bed Ideas for Dramatic Gardens

Gothic-inspired gardens bring an air of mystery, romance, and drama to outdoor spaces. With bold flower choices, dark tones, and striking structures, these flower beds transform your garden into a scene reminiscent of medieval elegance. Whether you’re inspired by Gothic architecture, literature, or simply love dramatic landscaping, these unique flower bed ideas will add character and intrigue to your outdoor retreat. Below are five stunning Gothic-inspired flower bed concepts to inspire your dramatic garden design.


1. Black Rose and Dark Foliage Bed

A Gothic garden isn’t complete without the allure of black roses. Pair them with plants that have deep burgundy or near-black foliage, such as Heuchera ‘Obsidian’ or Black Mondo Grass, to create a moody, sophisticated bed. The contrast of velvety petals against shadowy greenery adds an elegant sense of drama. Surround the bed with dark stone edging to intensify the Gothic effect, and add subtle lighting for nighttime intrigue. This design evokes mystery while maintaining timeless beauty.


2. Stone-Edged Gothic Arch Bed

Create a flower bed beneath a wrought-iron or stone arch for a truly Gothic-inspired design. The arch can be adorned with climbing flowers like black or deep purple clematis, wisteria, or even dark red climbing roses. Beneath the arch, plant lavender, foxglove, or monkshood to add an enchanted yet dramatic touch. The stone edging grounds the flower bed with a medieval feel, while the arch frames the bed like an entryway to a secret garden.


3. Gargoyle-Accented Bed with Dark Blooms

For a bold Gothic statement, incorporate garden statues or gargoyle accents into your flower bed. Surround these figures with dark-hued blooms like dahlias, calla lilies, or purple irises for a hauntingly beautiful effect. The combination of statuary and rich floral tones creates an old-world aesthetic that feels like it belongs in a castle courtyard. Adding creeping ground covers like ivy or vinca gives the bed a sense of wildness, enhancing its Gothic drama.


4. Moonlit White and Silver Gothic Bed

Not all Gothic-inspired gardens need to rely solely on dark tones—incorporating white and silver flowers creates a dramatic moonlit contrast. White roses, silver lamb’s ear, and ghostly foxglove varieties make a flower bed glow in the evening light. The interplay of pale hues against dark soil and iron accents creates an otherworldly atmosphere. Adding lantern-style garden lights nearby enhances the Gothic elegance, making this bed ideal for creating a magical nighttime display.


5. Towering Spire Flower Bed

Height is essential in Gothic design, and a spire-inspired flower bed captures that perfectly. Use tall, dramatic plants like delphiniums, lupines, or hollyhocks to create vertical structure. Arrange them in layers, with shorter, darker flowers like pansies or black tulips at the base to enhance depth. Edging the bed with ornate wrought iron fencing gives it a cathedral-like feel. This vertical design draws the eye upward, reflecting the grandeur and dramatic proportions of Gothic architecture.


Conclusion
Gothic-inspired flower beds offer a striking way to bring mystery, romance, and bold elegance to your garden. By blending dark blooms, dramatic structures, and enchanting design elements, you can transform your outdoor space into a dramatic retreat that feels both timeless and otherworldly. Whether you prefer black roses, stone arches, or glowing moonlit flowers, these Gothic themes add unforgettable character to your garden design.